Company News
How to get $IMX on Immutable zkEVM
May 3, 2024


So you want to get some $IMX tokens into your Immutable zkEVM Passport. Here is what you will need:
Immutable Passport (sign-up here)
Funds in ETH, USDC, or $IMX on a Centralized Exchange (CEX) or another compatible EVM chain on the Ethereum network (including ETH L1)
There are multiple options for getting $IMX onto Immutable zkEVM:
Bridging from a centralized exchange (CEX)
Layerswap (Supports $IMX, ETH, USDC and $GOG)
Bridging from another EVM chain or Ethereum (L1)
Squid (Supports $IMX, ETH, USDC and many more!)
Layerswap (Supports $IMX, ETH, USDC and $GOG)
Native Bridge powered by Axelar (Only supports moving $IMX, ETH or USDC from/to ETH L1)
**Note**: If you bridge ETH or USDC to Immutable zkEVM you will then need to swap those tokens for $IMX using one of the following options:
Native Swap (powered by Quickswap) accessible via Immutable Dashboard or Immutable Toolkit (Not available in US or Australia)
Bridging from a centralized exchange (CEX)
Currently, direct deposits from a CEX (e.g., Coinbase, Binance) to Immutable zkEVM are not possible. Consequently, do not transfer funds from a CEX to your Immutable Passport directly.
To bridge funds from a CEX to your zkEVM Immutable Passport make sure to follow the instructions below
Step 1: Go to https://toolkit.immutable.com/cex-deposit/
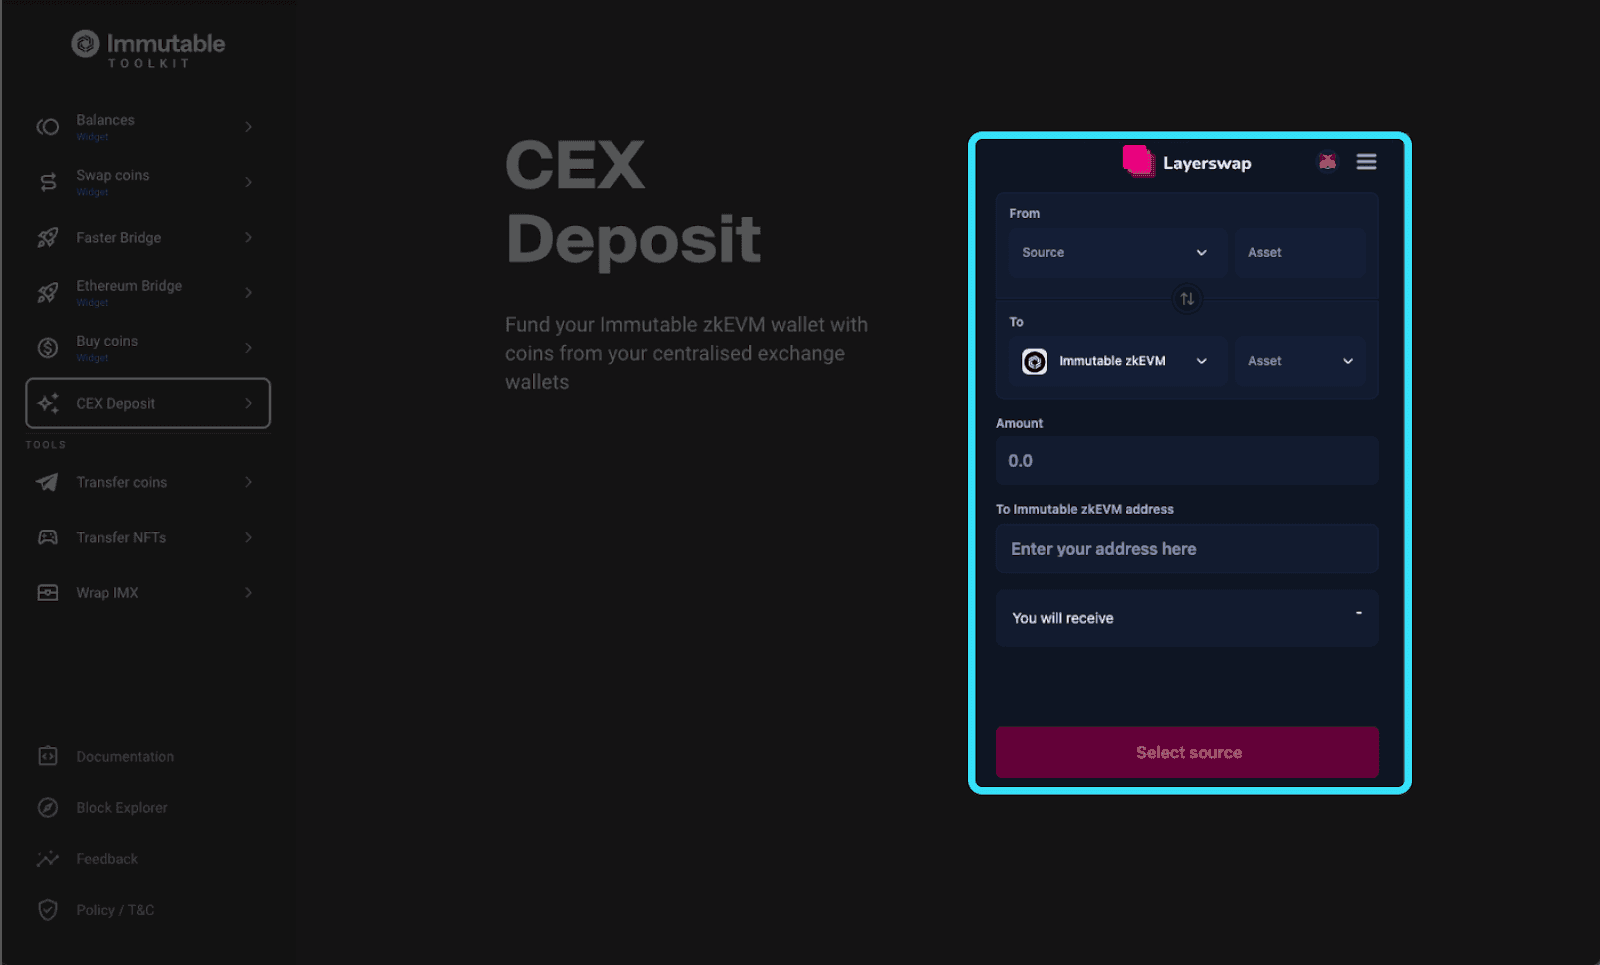
Step 2:
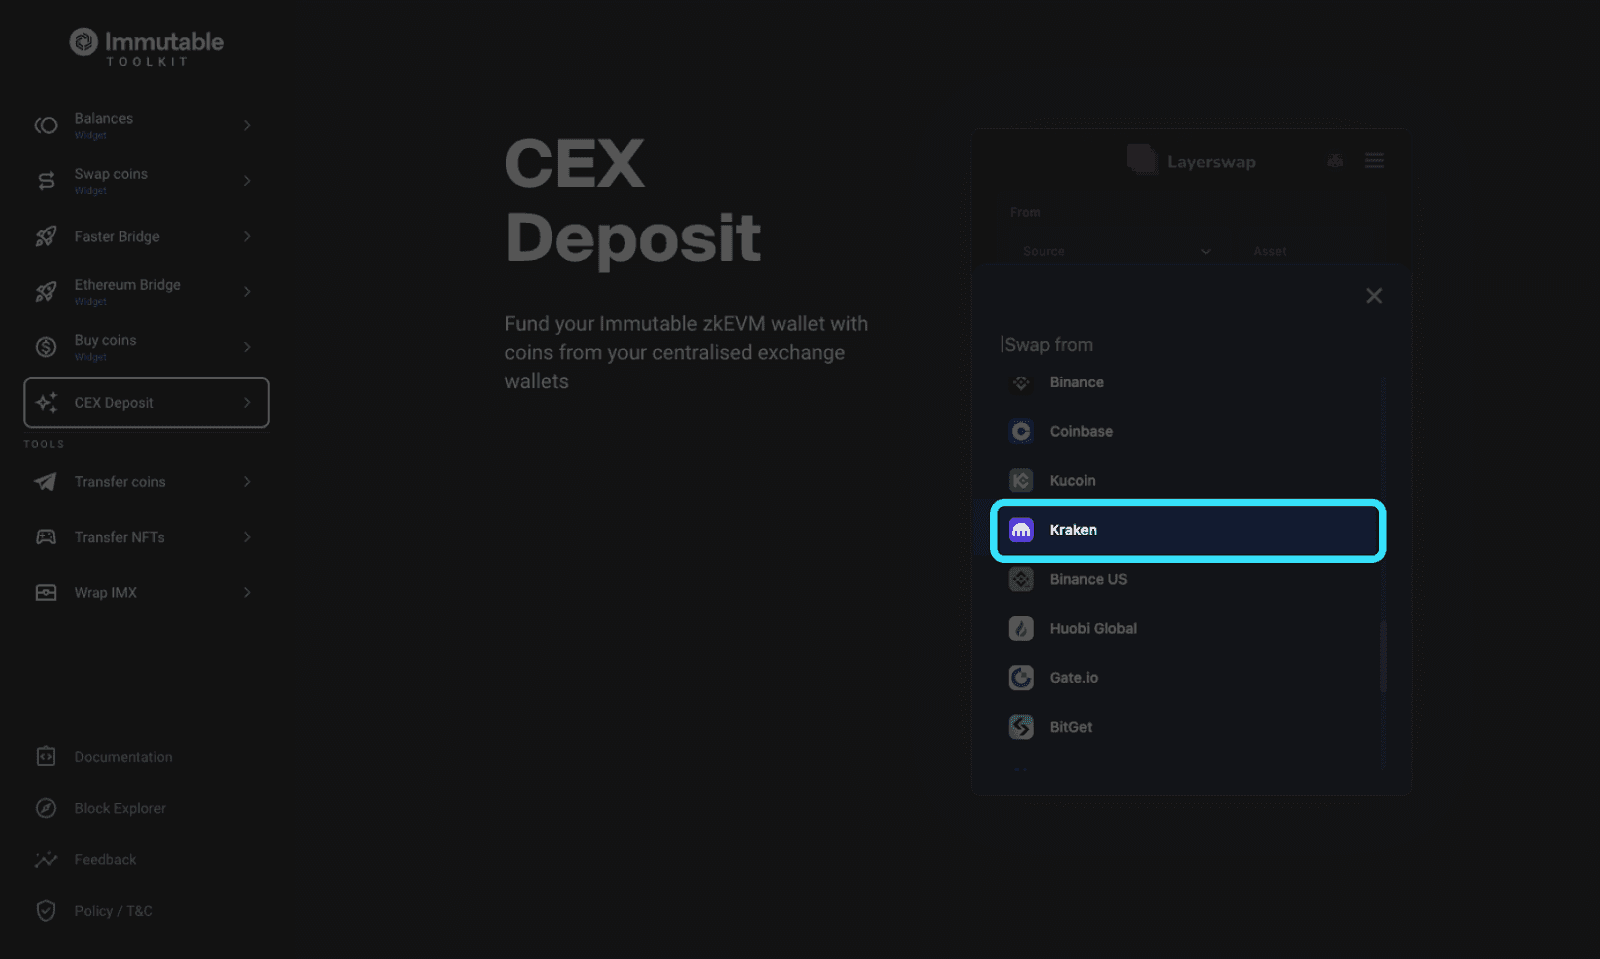
Input the CEX you would like to deposit from
Select which token, $IMX, ETH or USDC, that you would like to bridge
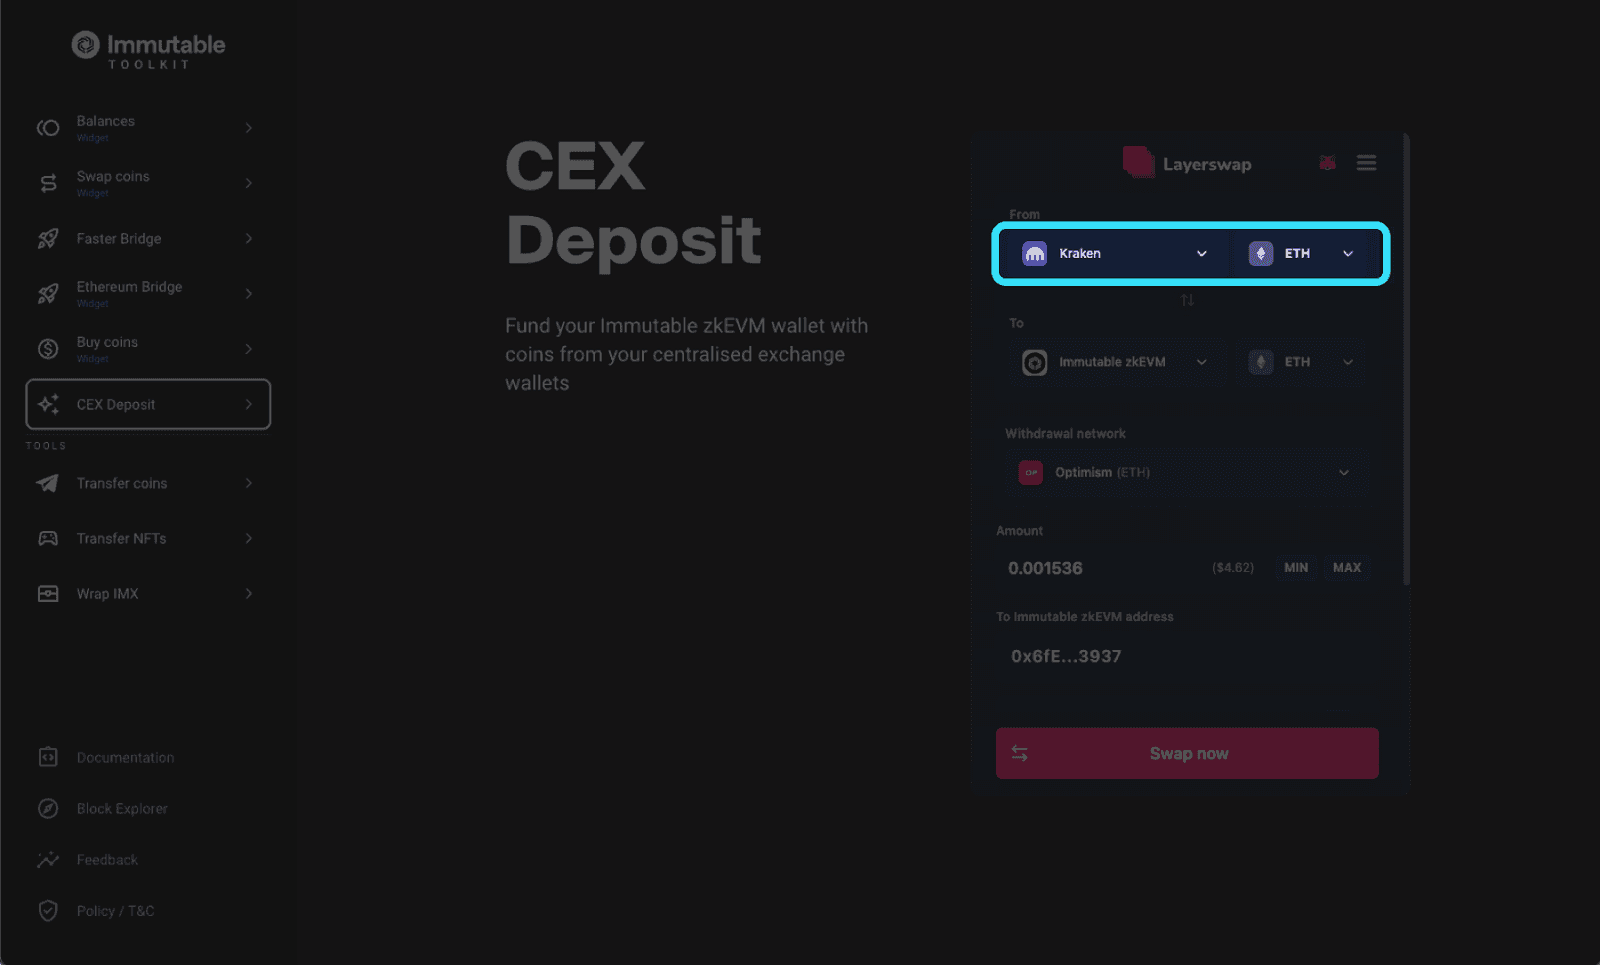
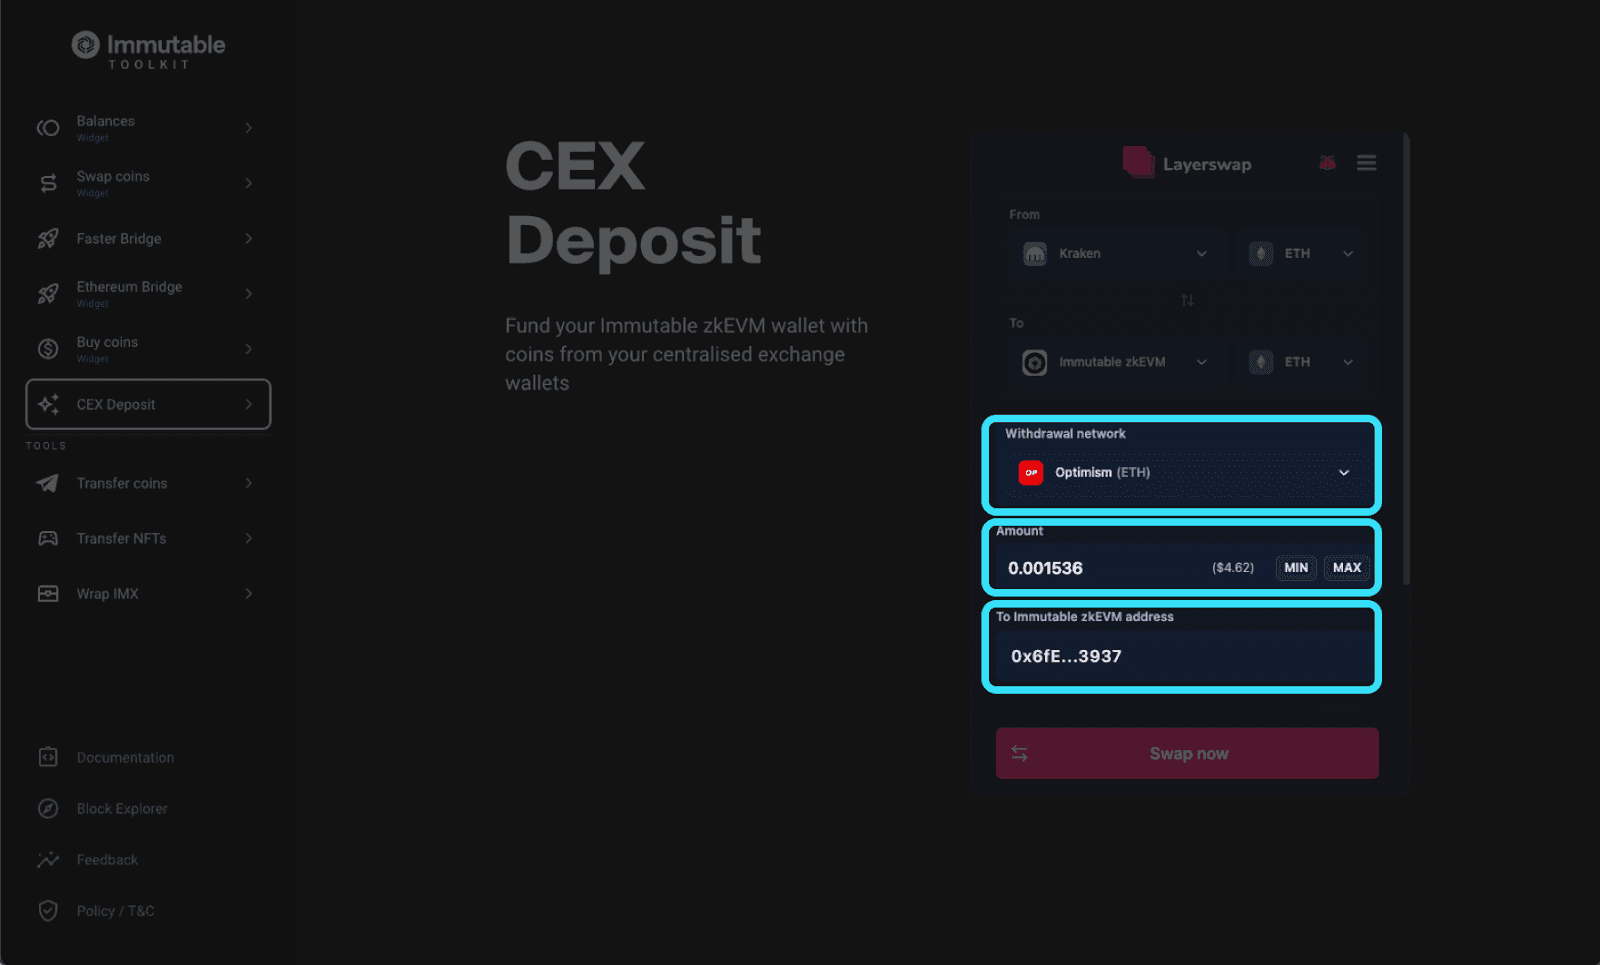
Step 3:
Select a withdrawal network your CEX supports (e.g., Ethereum, Optimism etc.)
Input the desired amount and the wallet address to deposit into (this can be your Passport address or another wallet that supports Immutable zkEVM)
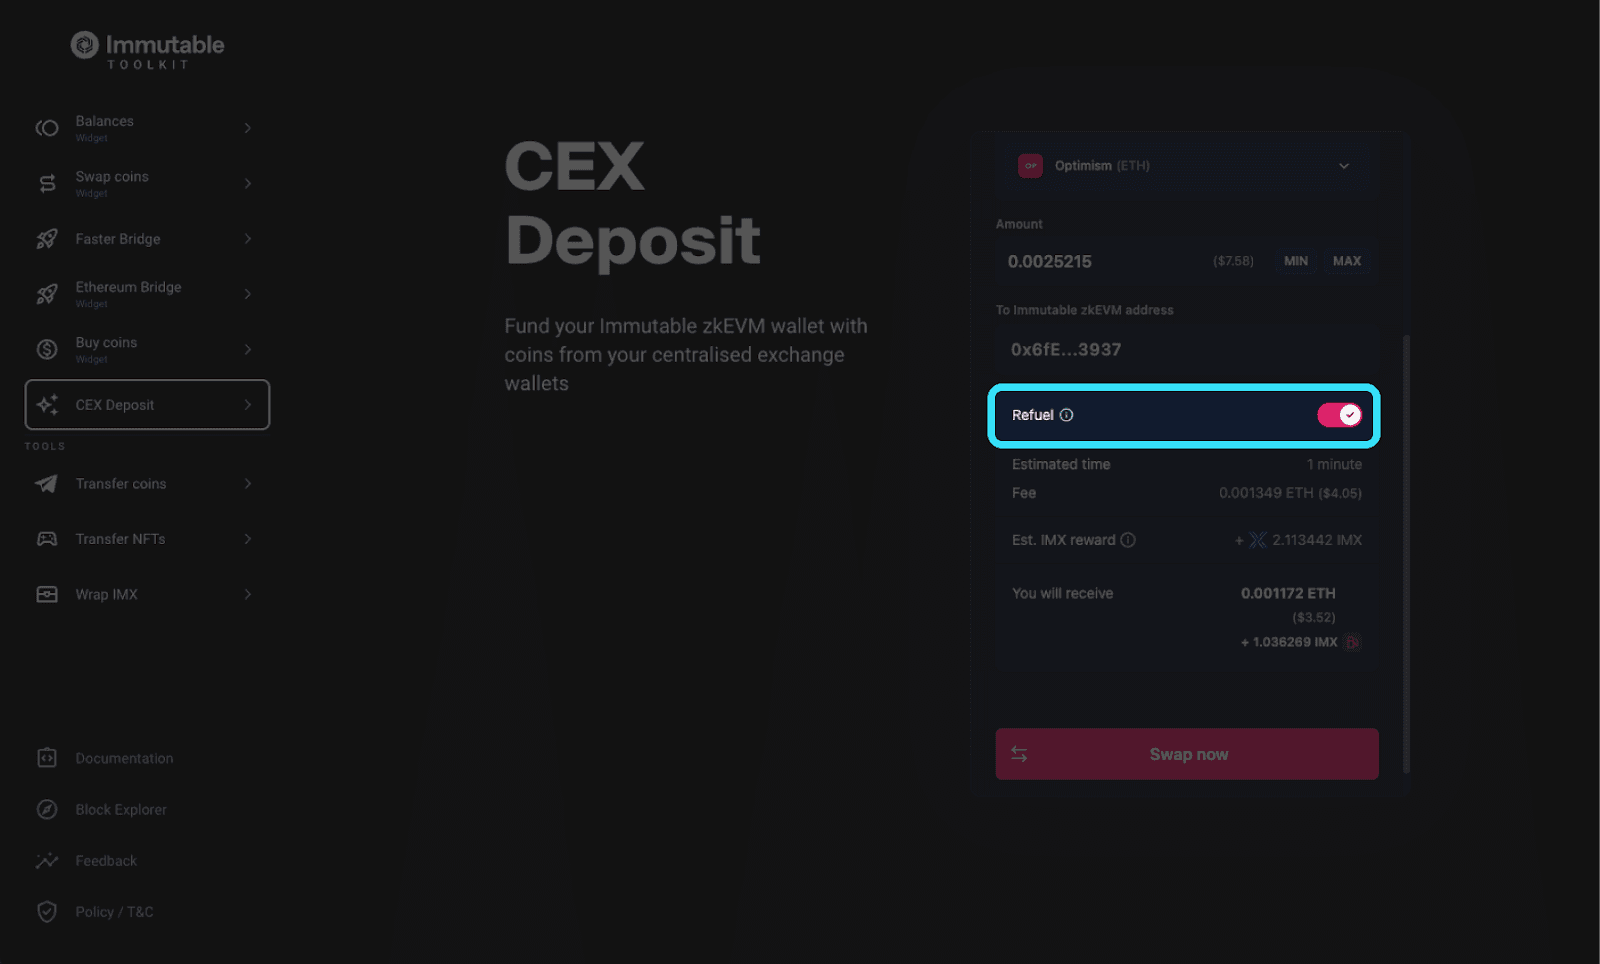
Step 4:
Pro tip: Turn on “Refuel”. This will give you some $IMX to pay for gas on Immutable zkEVM. Without it you may need to bridge more funds to pay for gas!
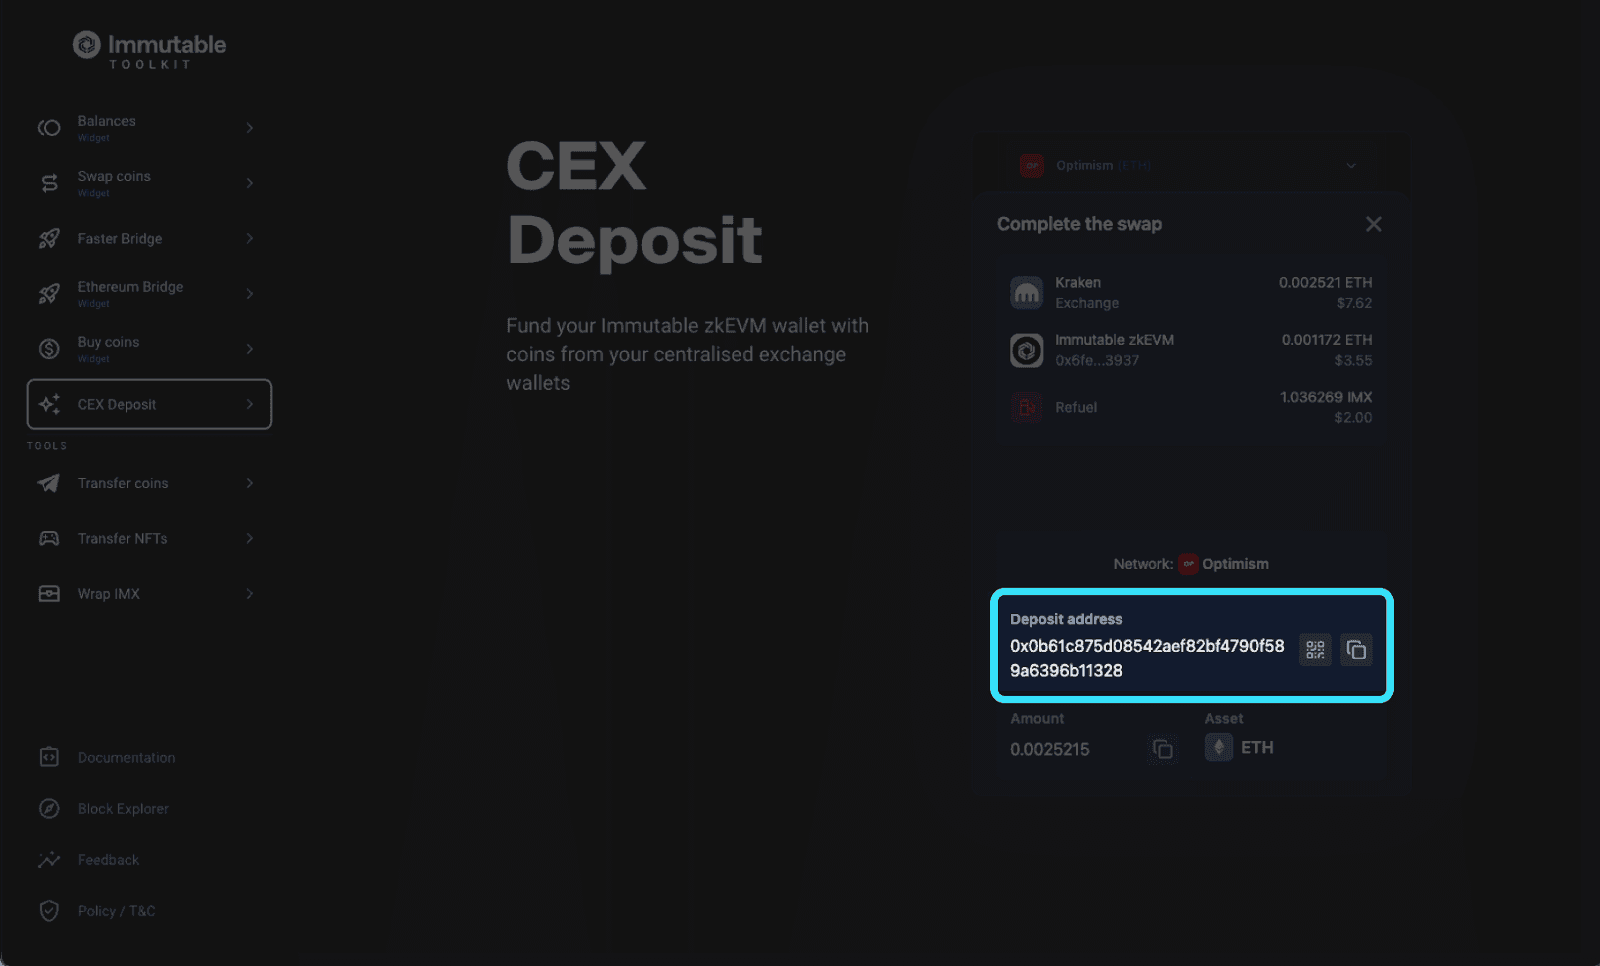
Click "swap now" and copy the "deposit address" generated
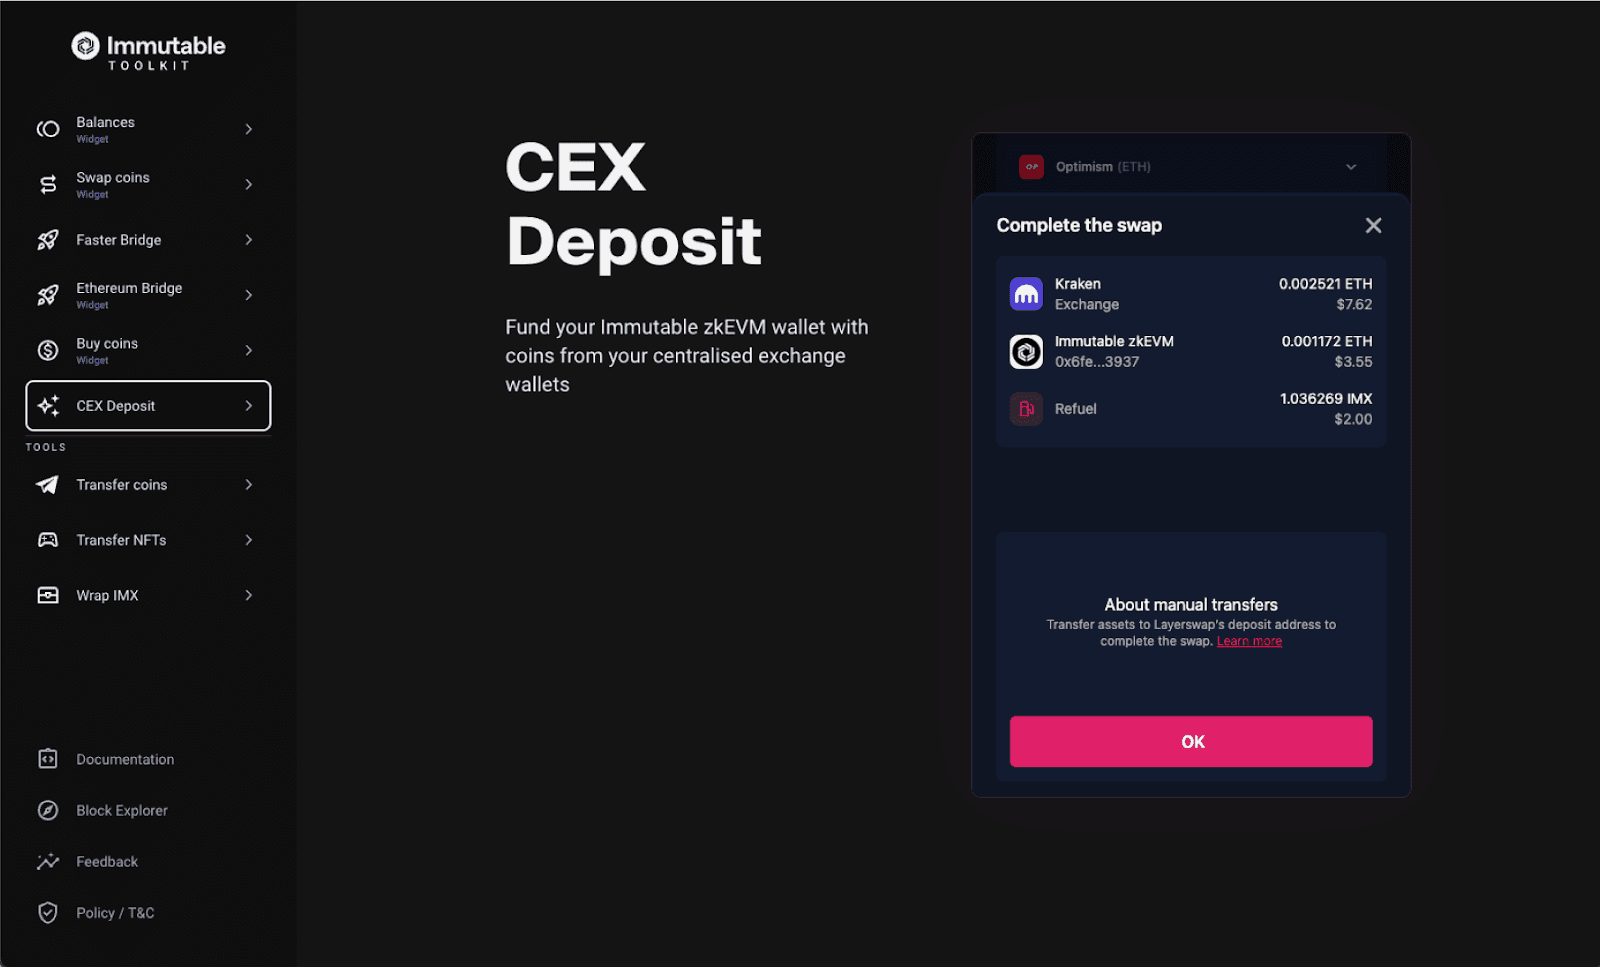
Step 5:
Navigate to the centralised exchange you are withdrawing from (in this example it’s Kraken)
Input the same withdrawal network you selected in step 3 and input the deposit address copied in step 4
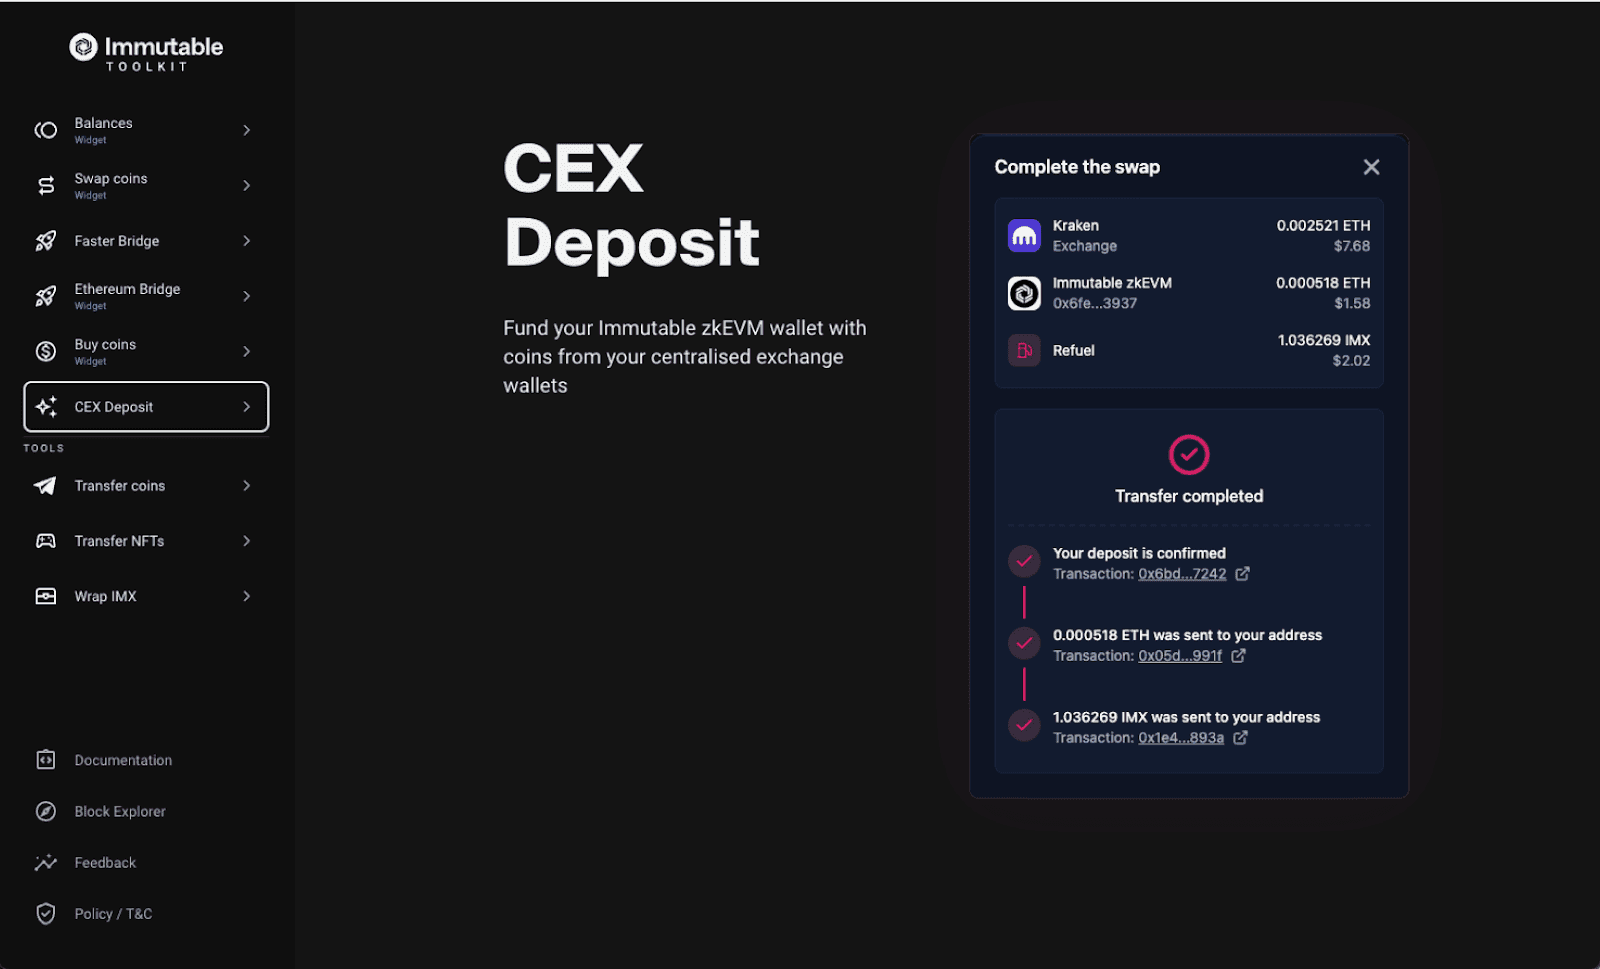
Withdraw from the centralised exchange

Bridging from another EVM chain or Ethereum (L1)
Option 1: Bridging funds using Squid
Step 1: Go to https://toolkit.immutable.com/squid-bridge/
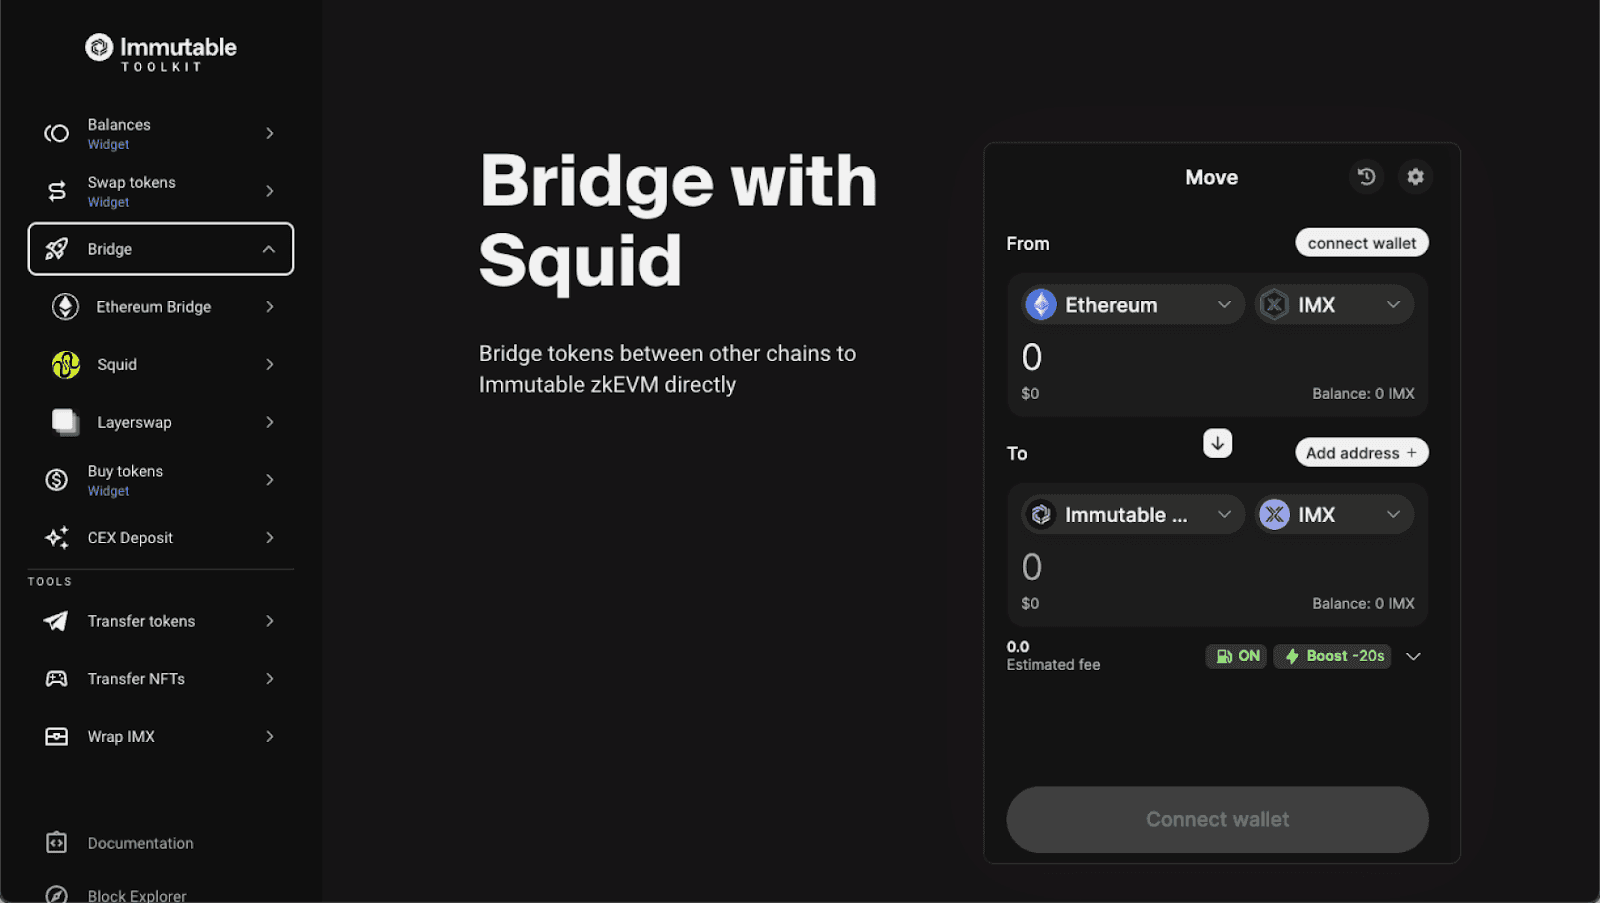
Step 2:
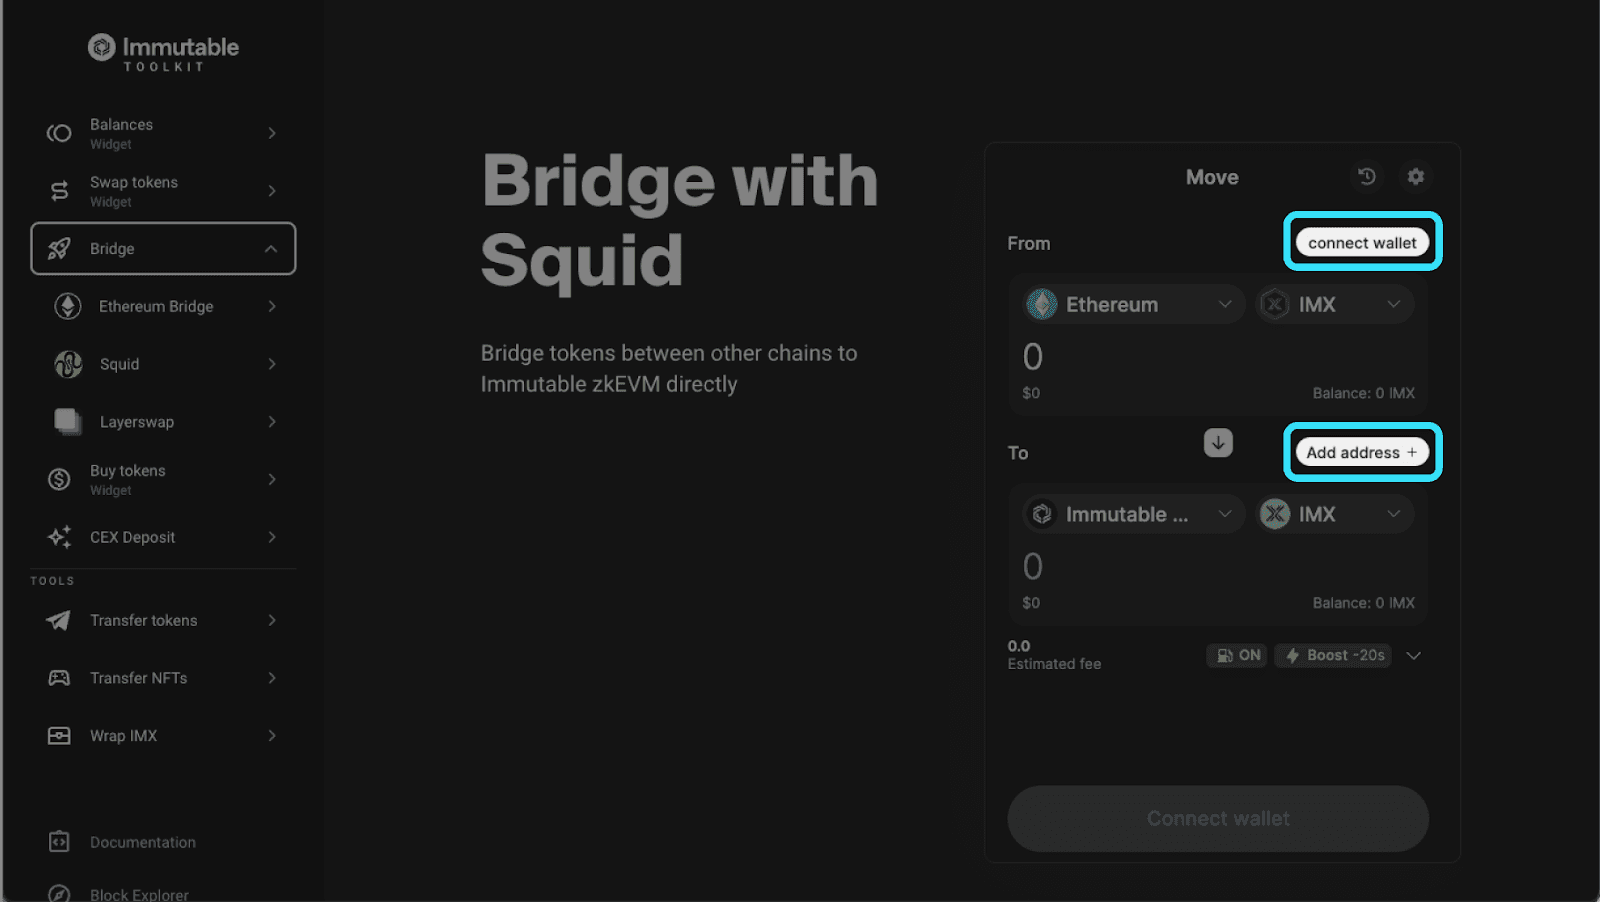
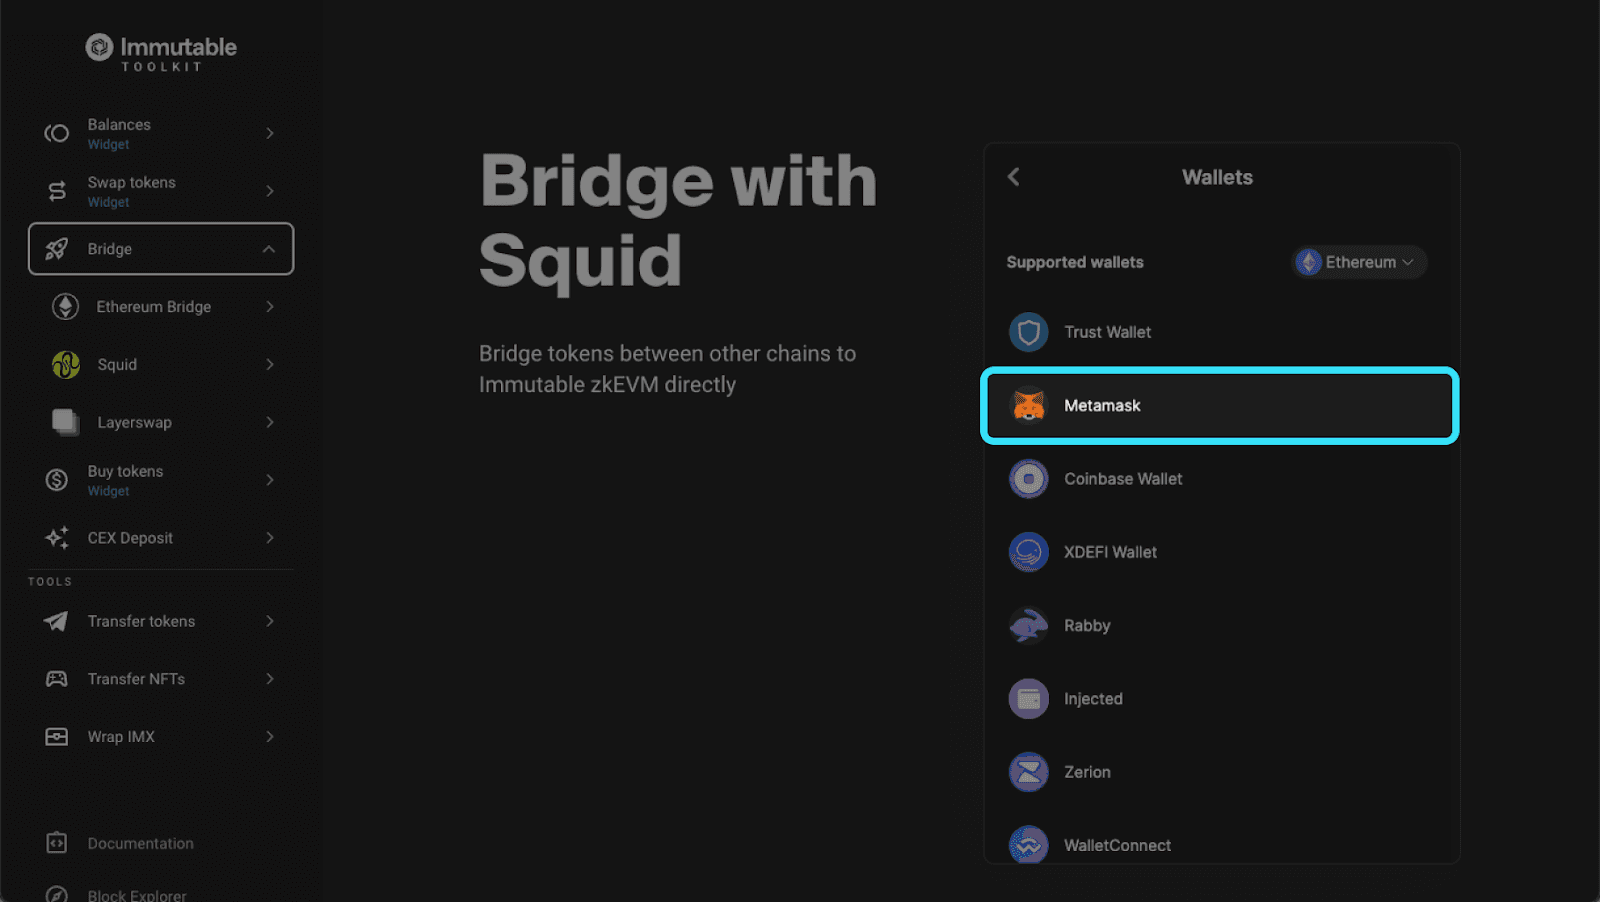
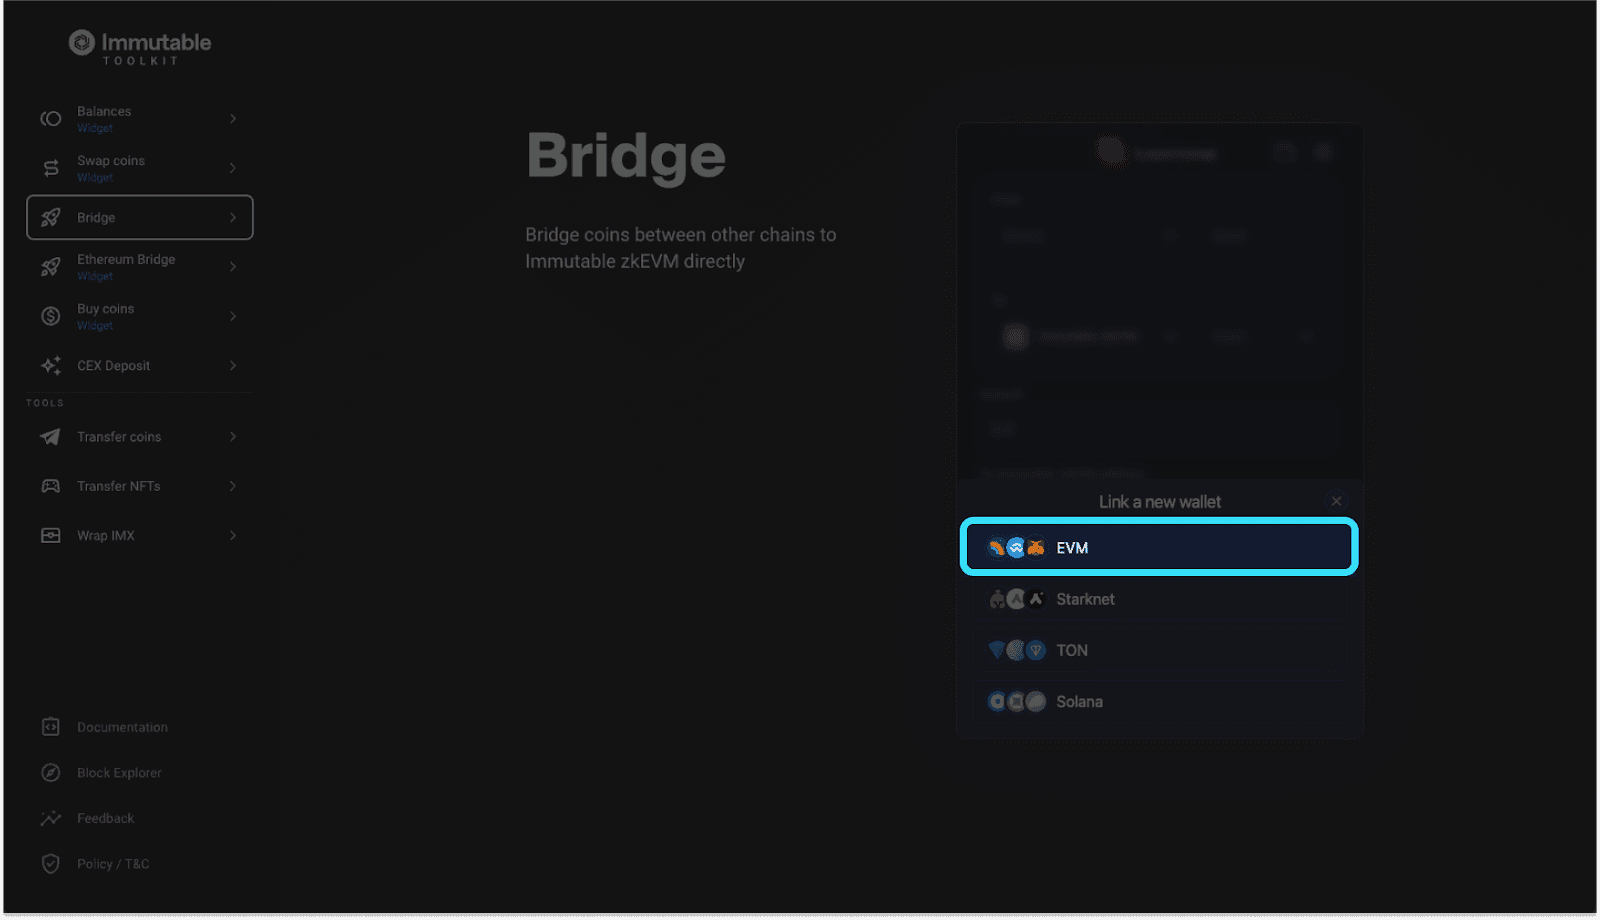
Connect the wallet you would like to move funds from
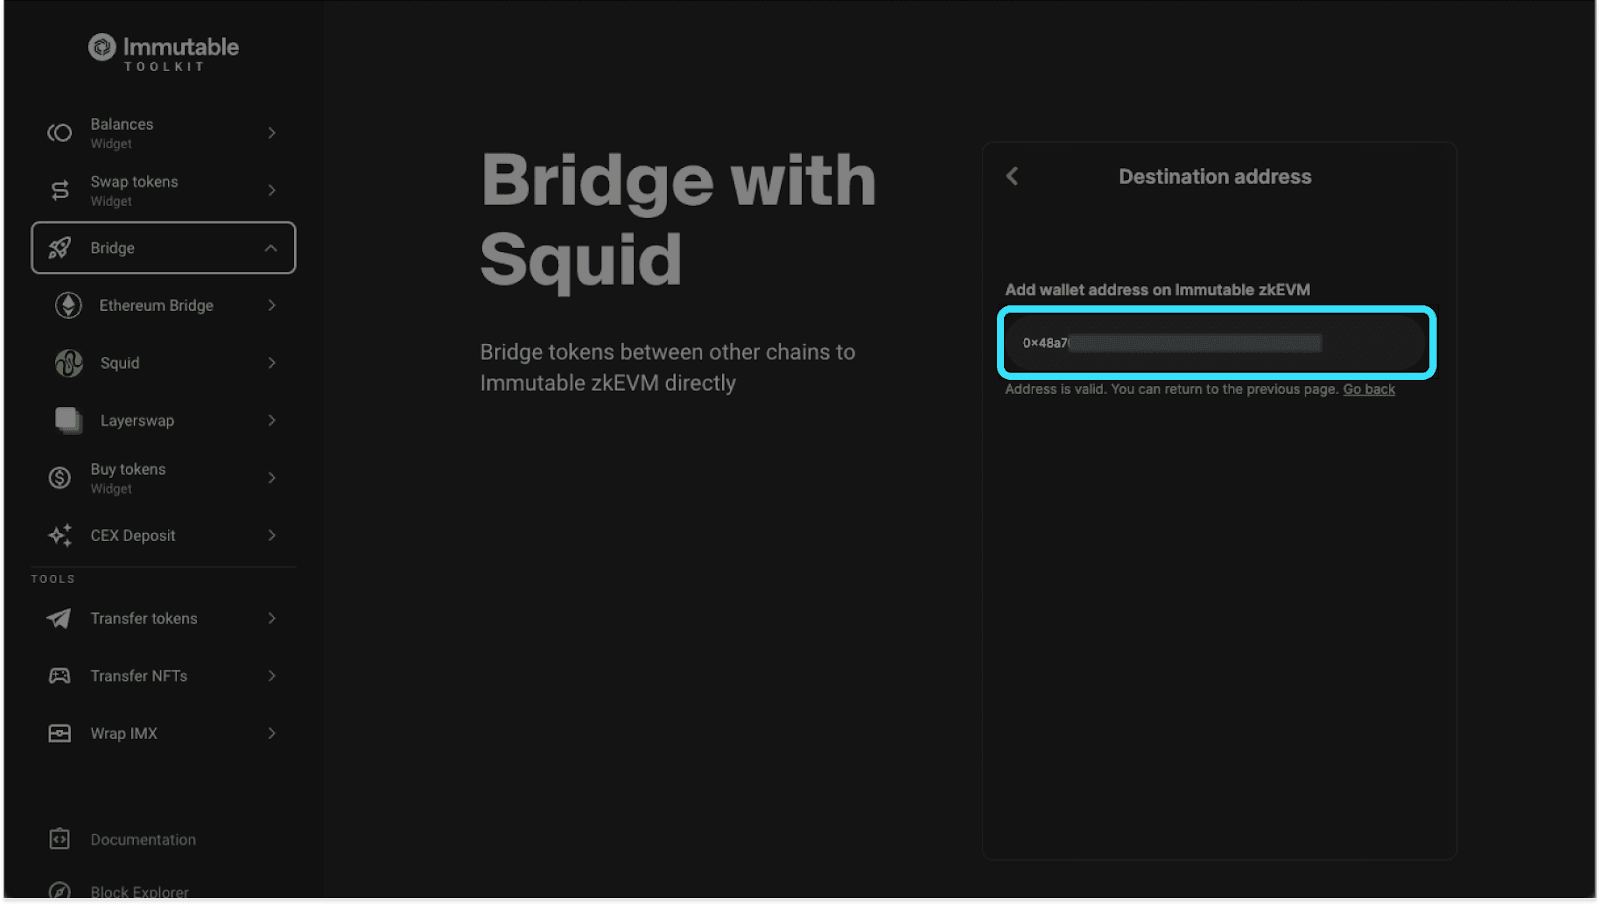
Add a new address that you would like to send funds to
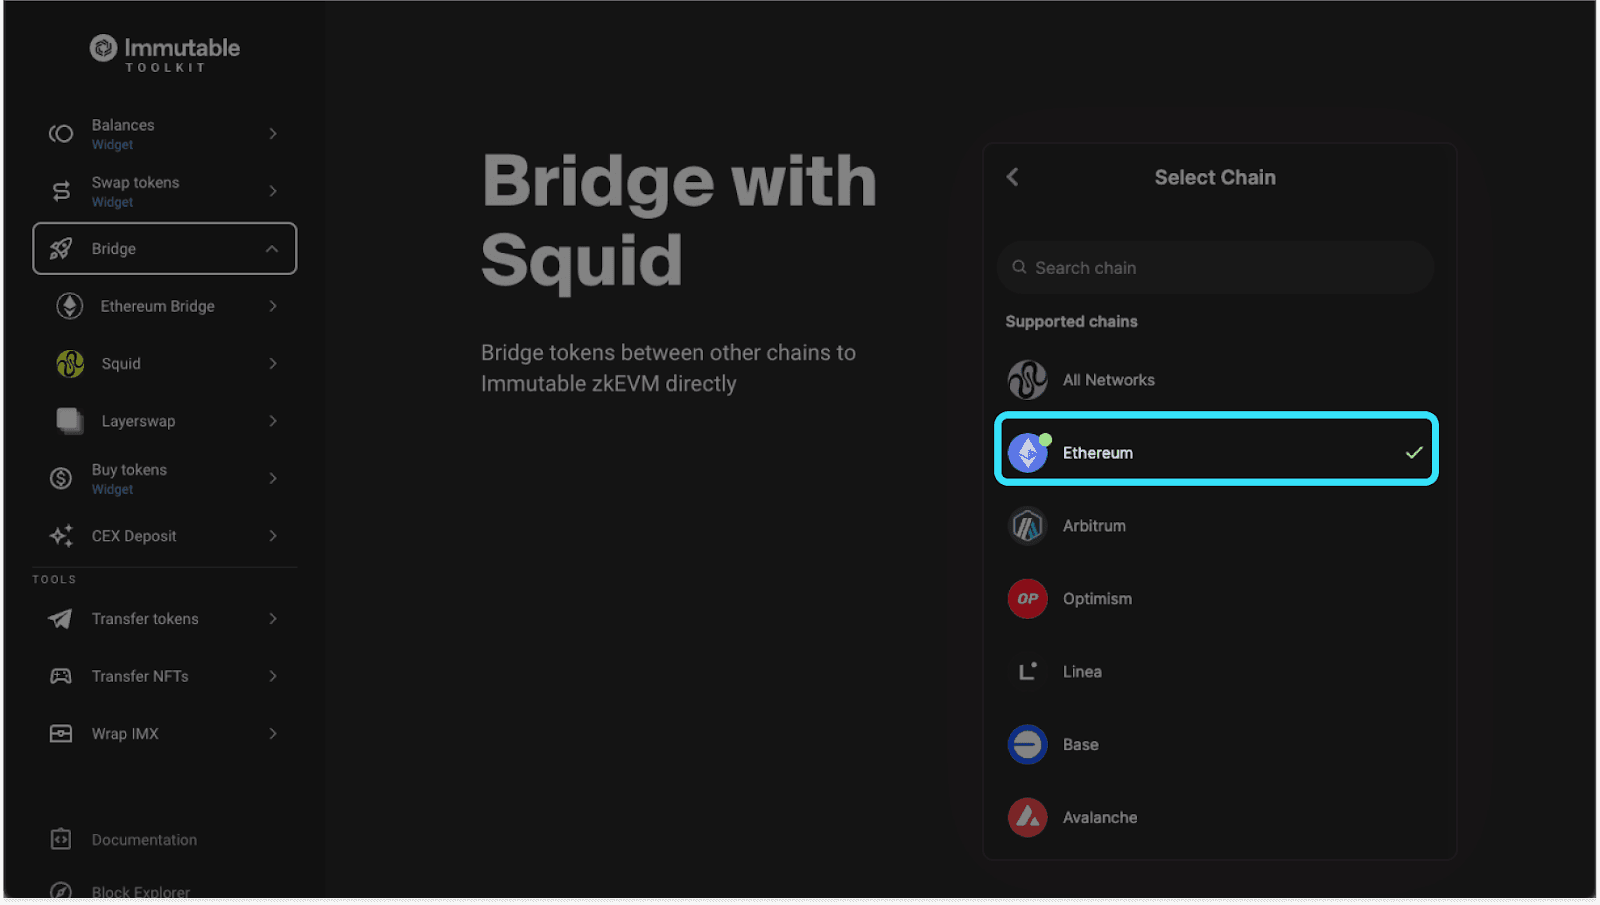
Step 3:
Select the network you want to send from (Note: you can send from ETH L1 or other compatible EVM chains)
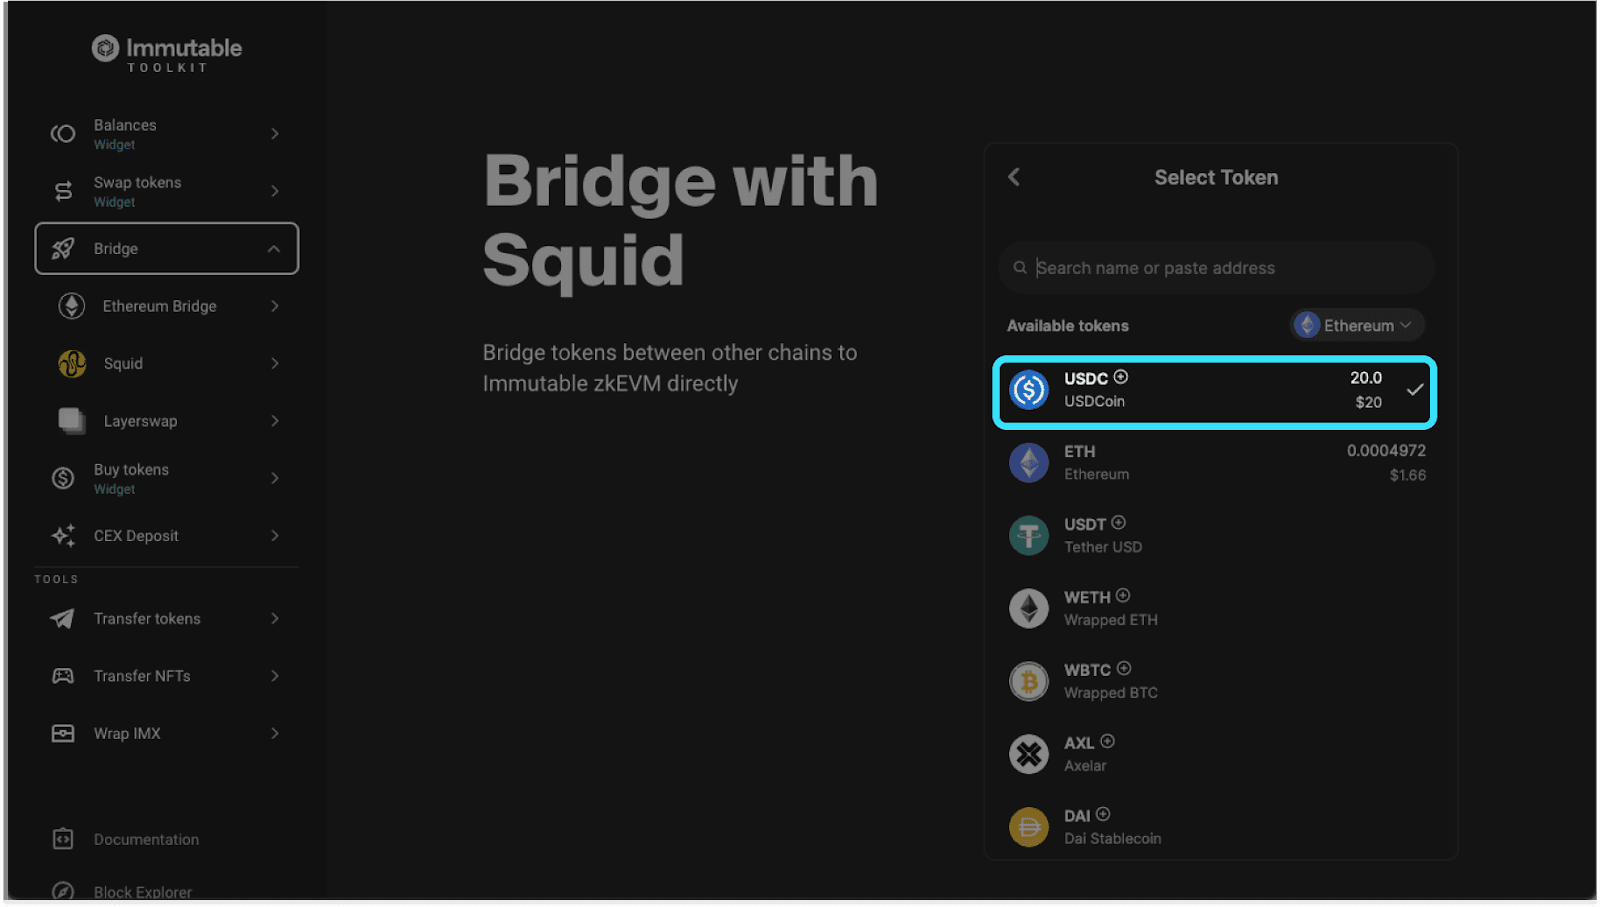
Select the token you would like to move
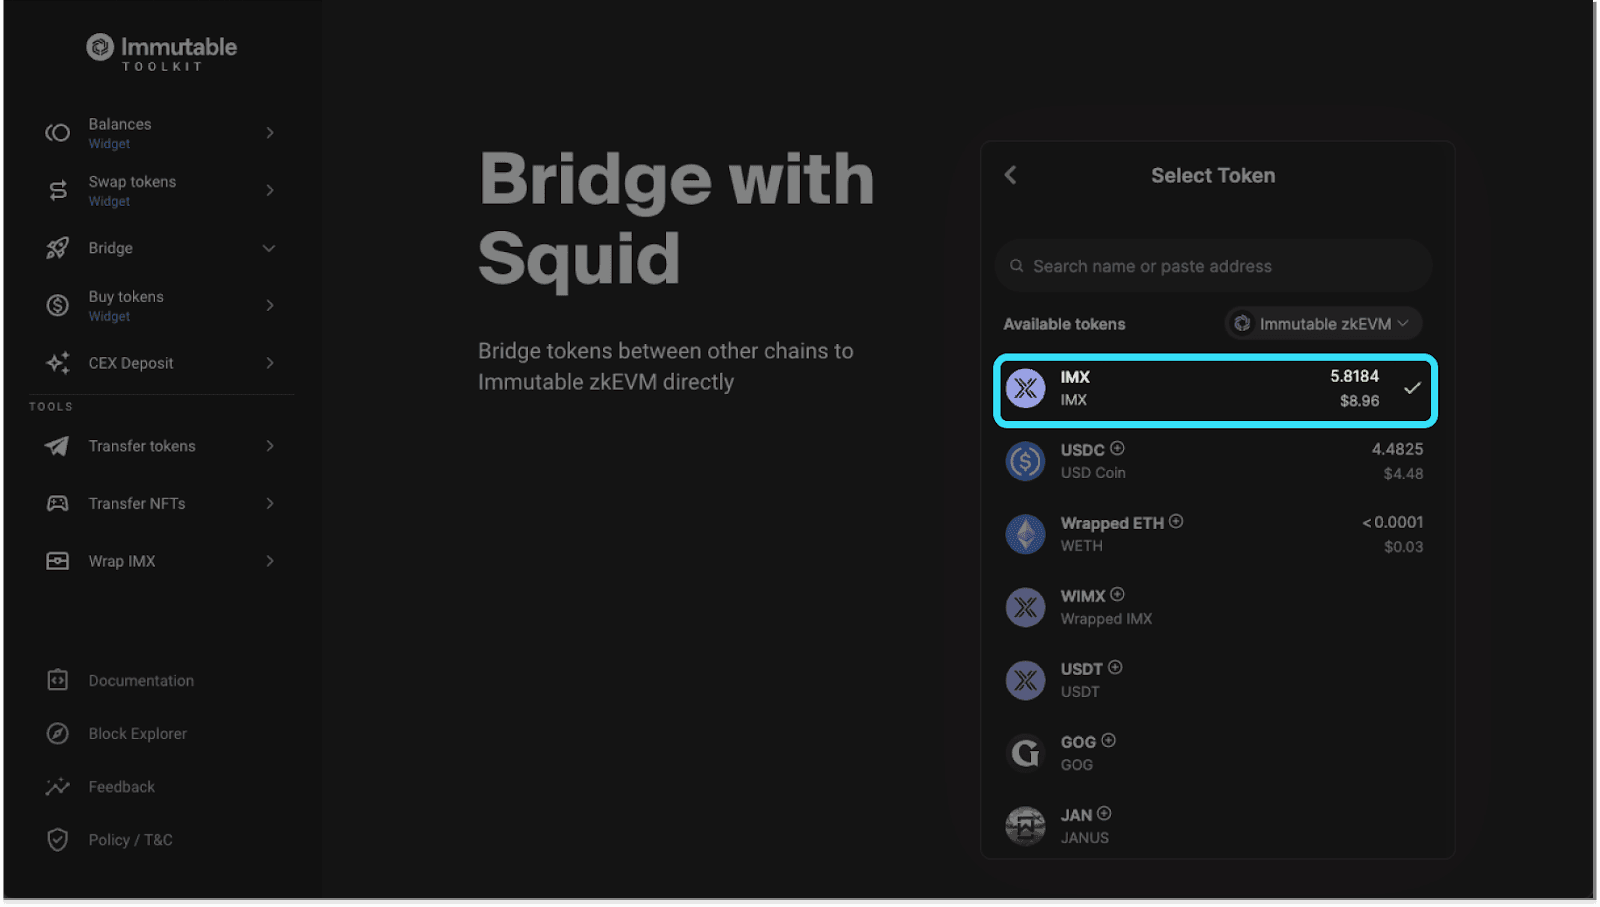
Step 4:
Select the token you would like to receive
Input the desired amount you want to bridge (note make sure you have enough gas for the transfer if required)
IMPORTANT NOTE: With Squid you will be able to bridge and swap a token at the same time, if you wish. This means if you hold USDC or ETH in another wallet but want $IMX in your Passport, you will be able to send USDC and receive $IMX directly into your Passport. If you don’t want $IMX you can just bridge USDC or ETH straight into your Immutable Passport wallet.
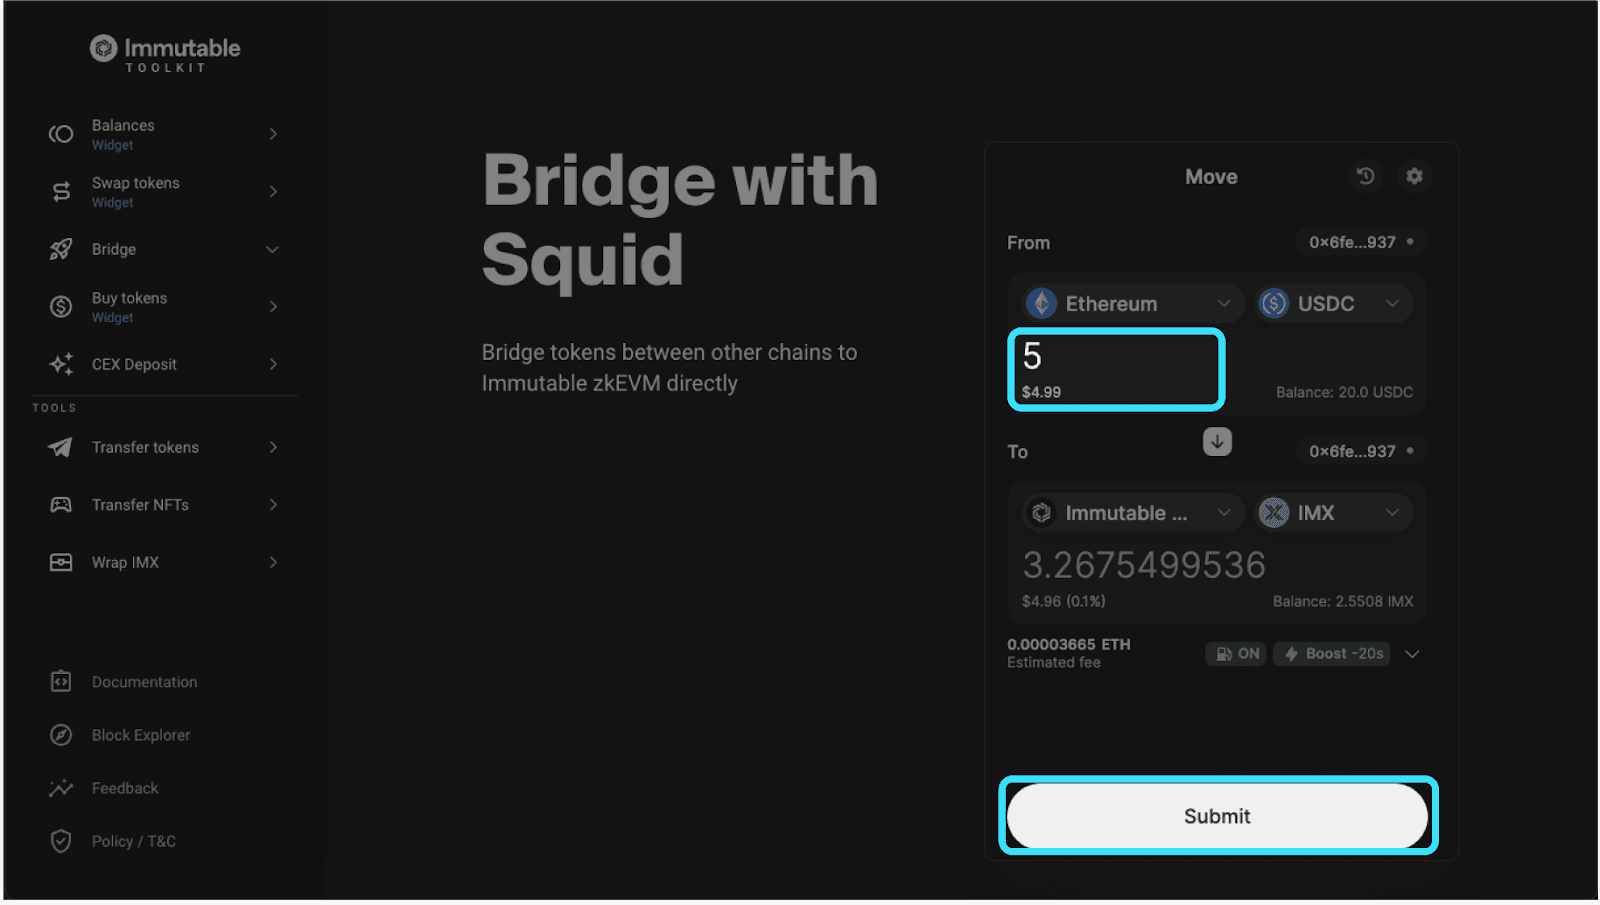
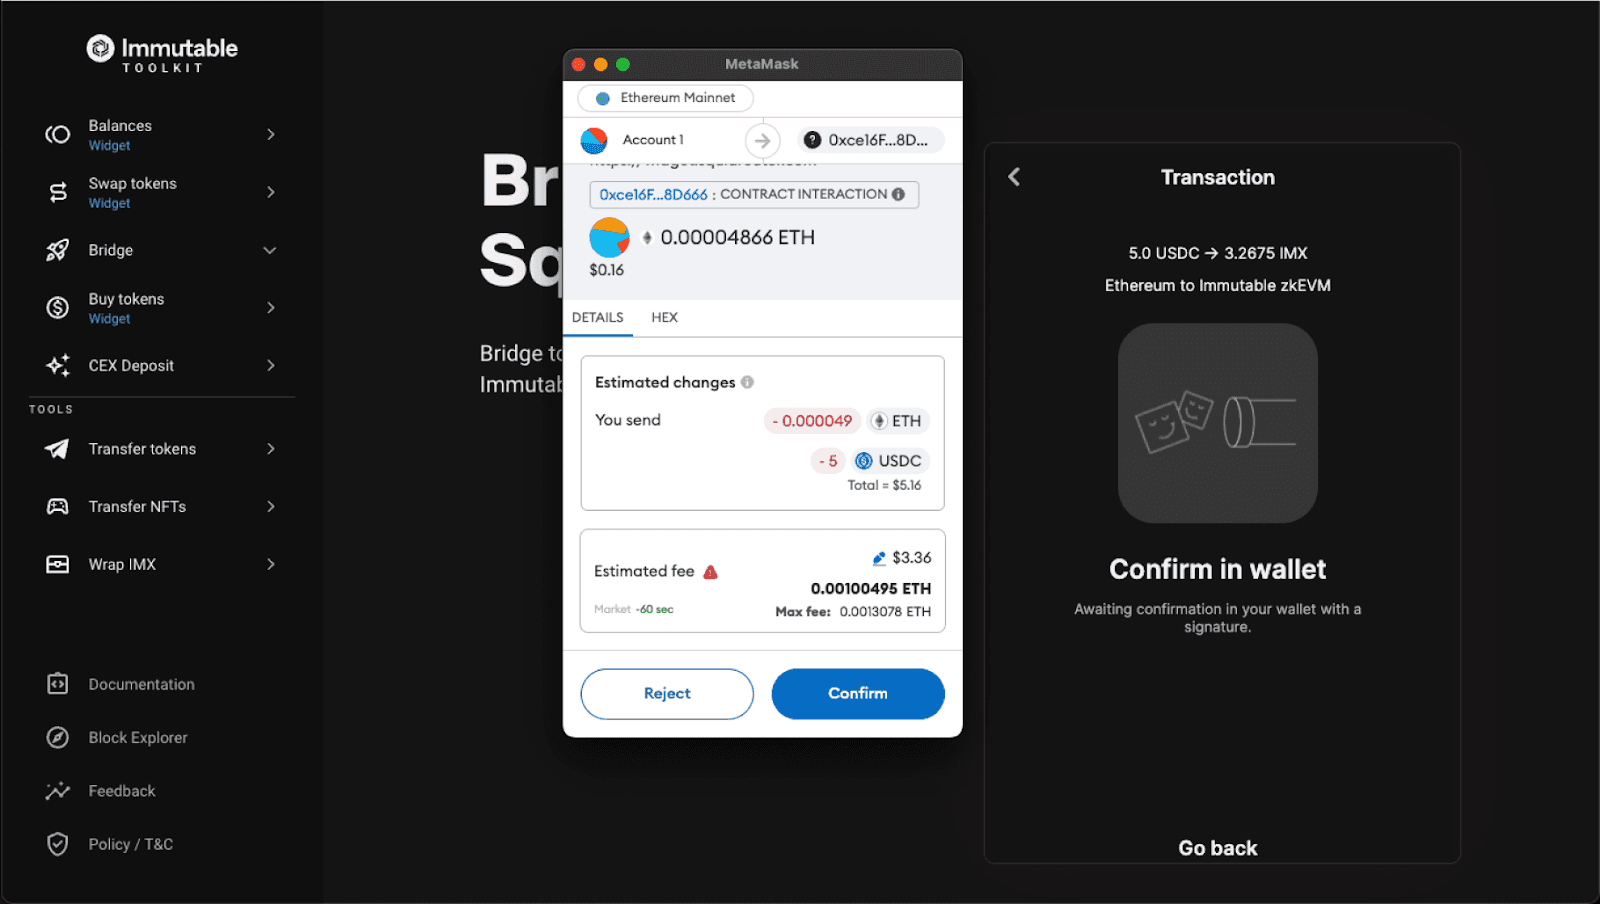
Step 5:
Click on ‘Submit’
“Approve” or “Confirm” the transaction in your wallet
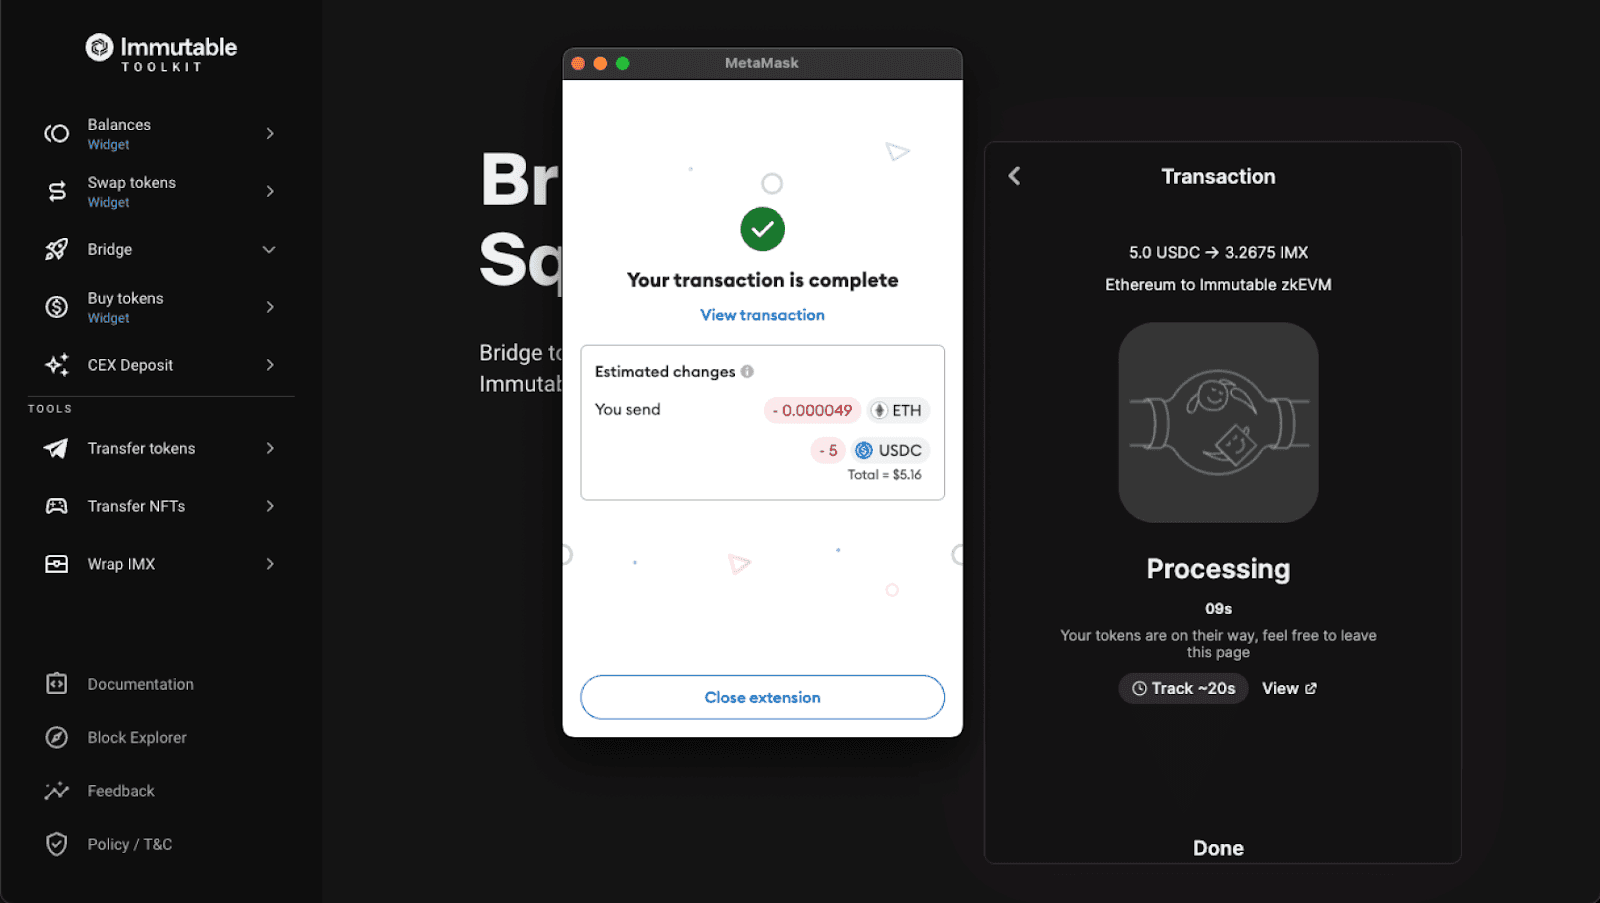
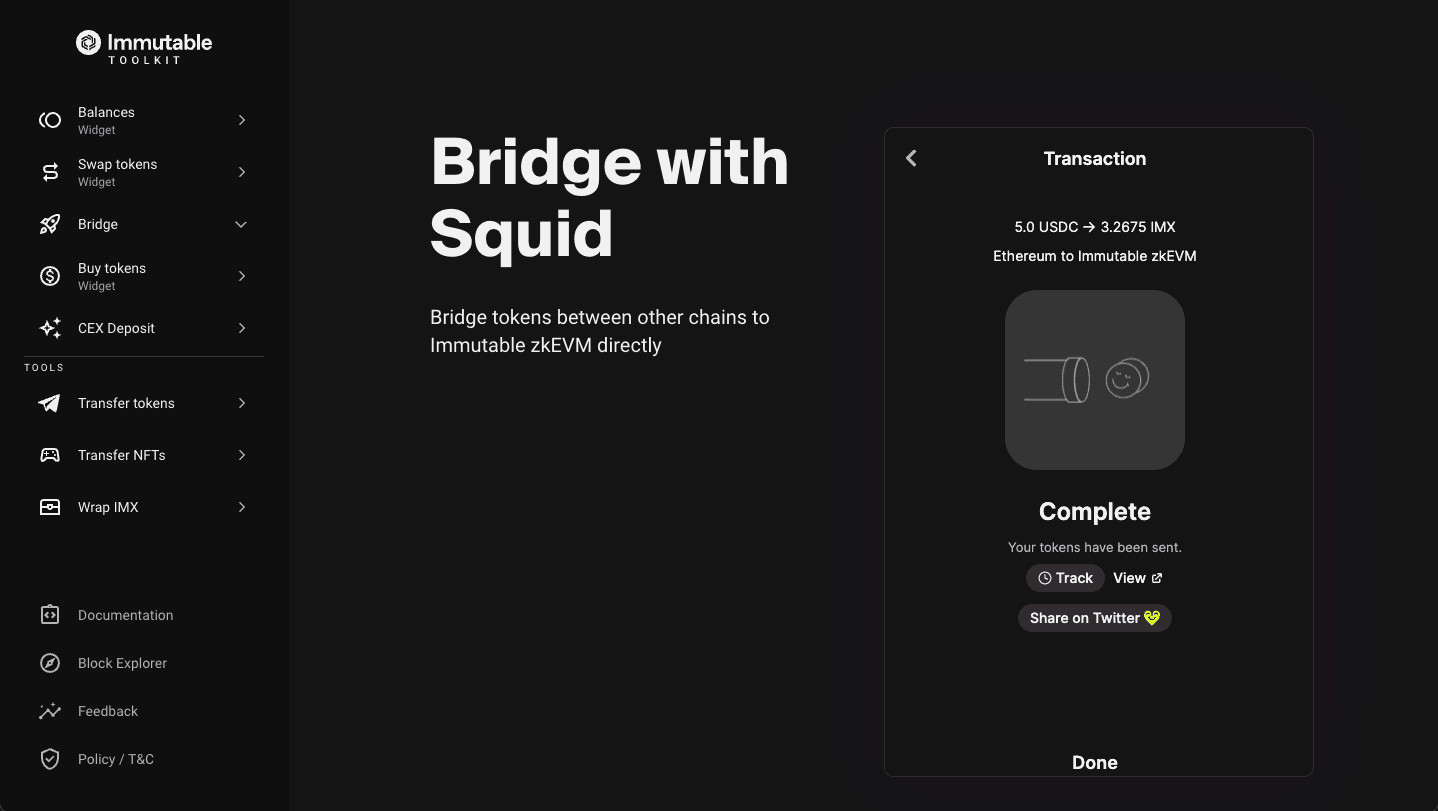
Congrats!! you now have bridged funds into your Immutable Passport
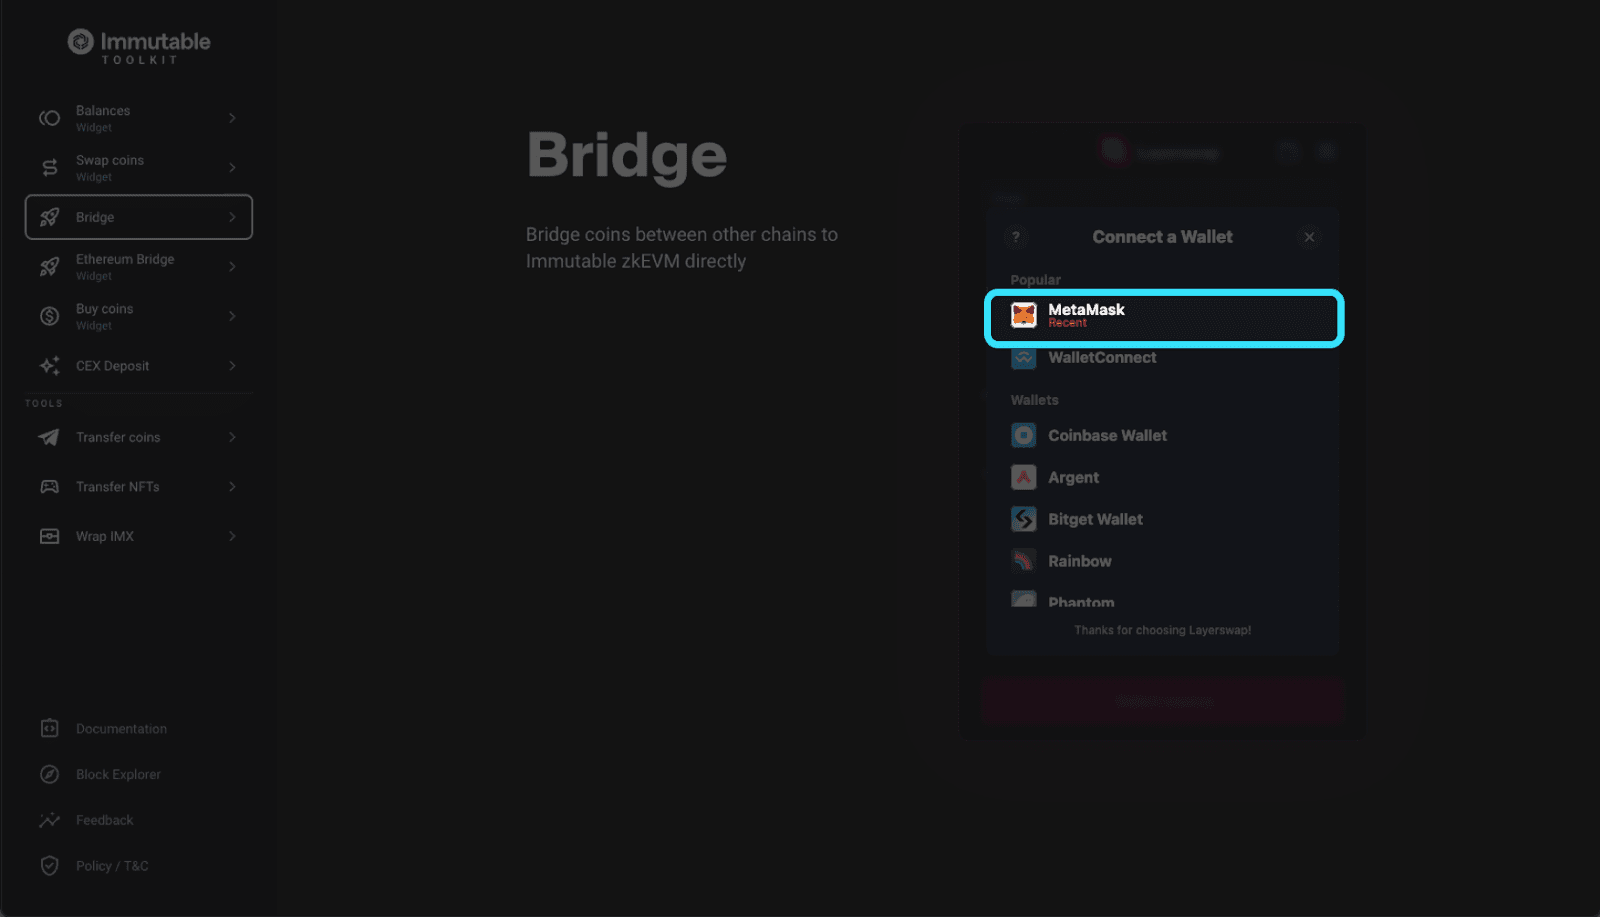
Option 2: Bridging funds using Layerswap
Step 1:
Connect the wallet you want to bridge funds from
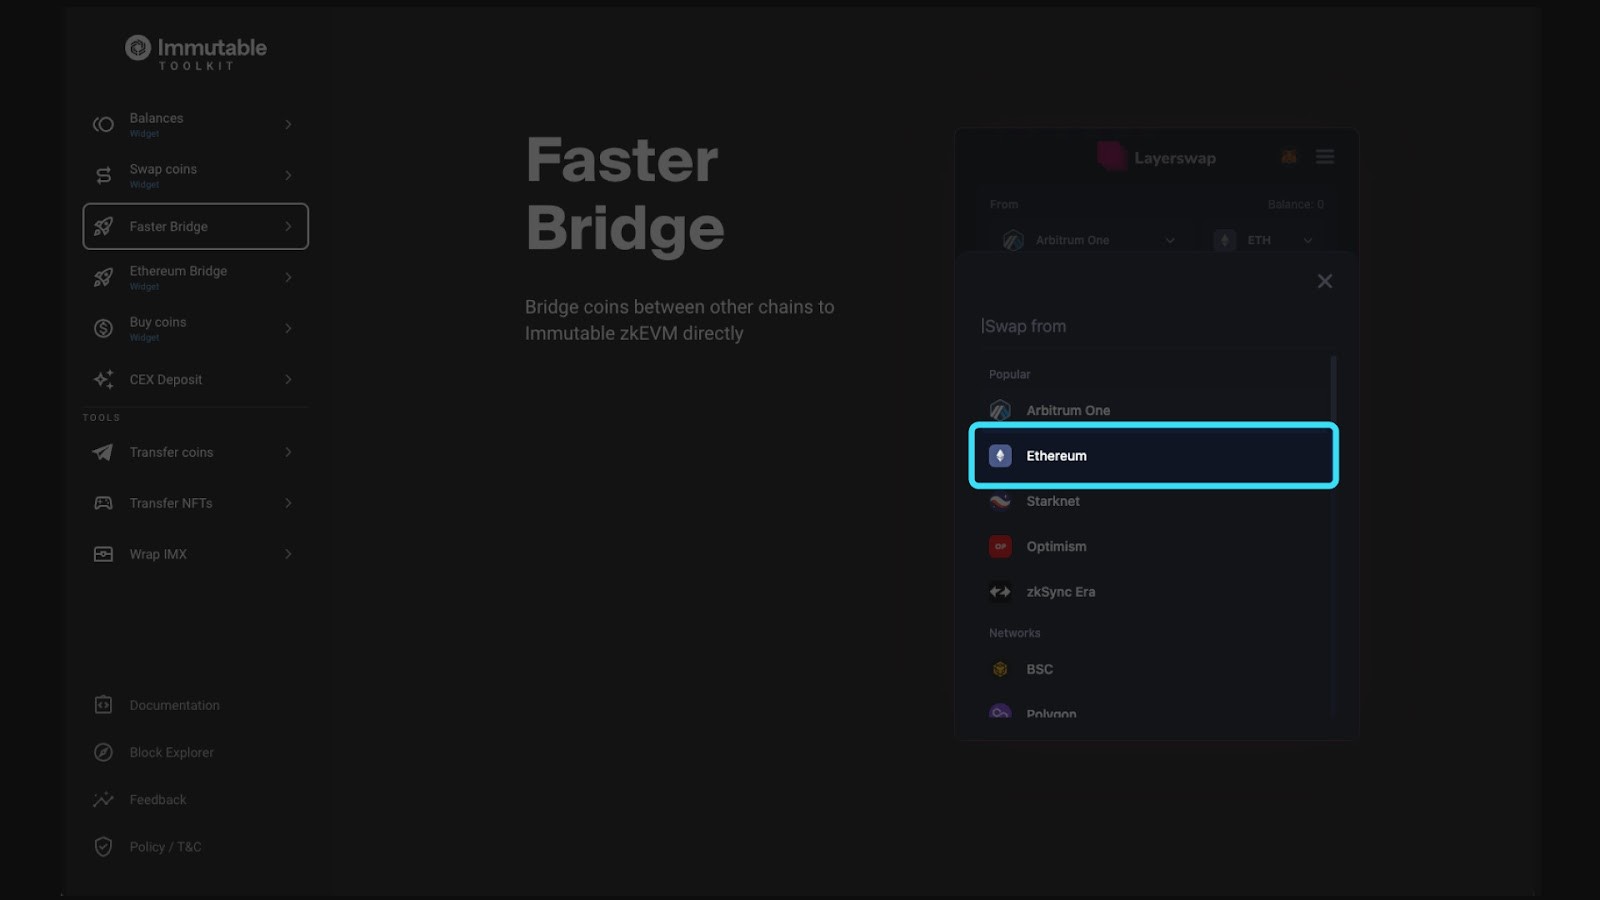
Step 2:
Select ‘Ethereum’ in the ‘From’ dropdown
Select the token ($IMX, ETH or USDC) you want to bridge
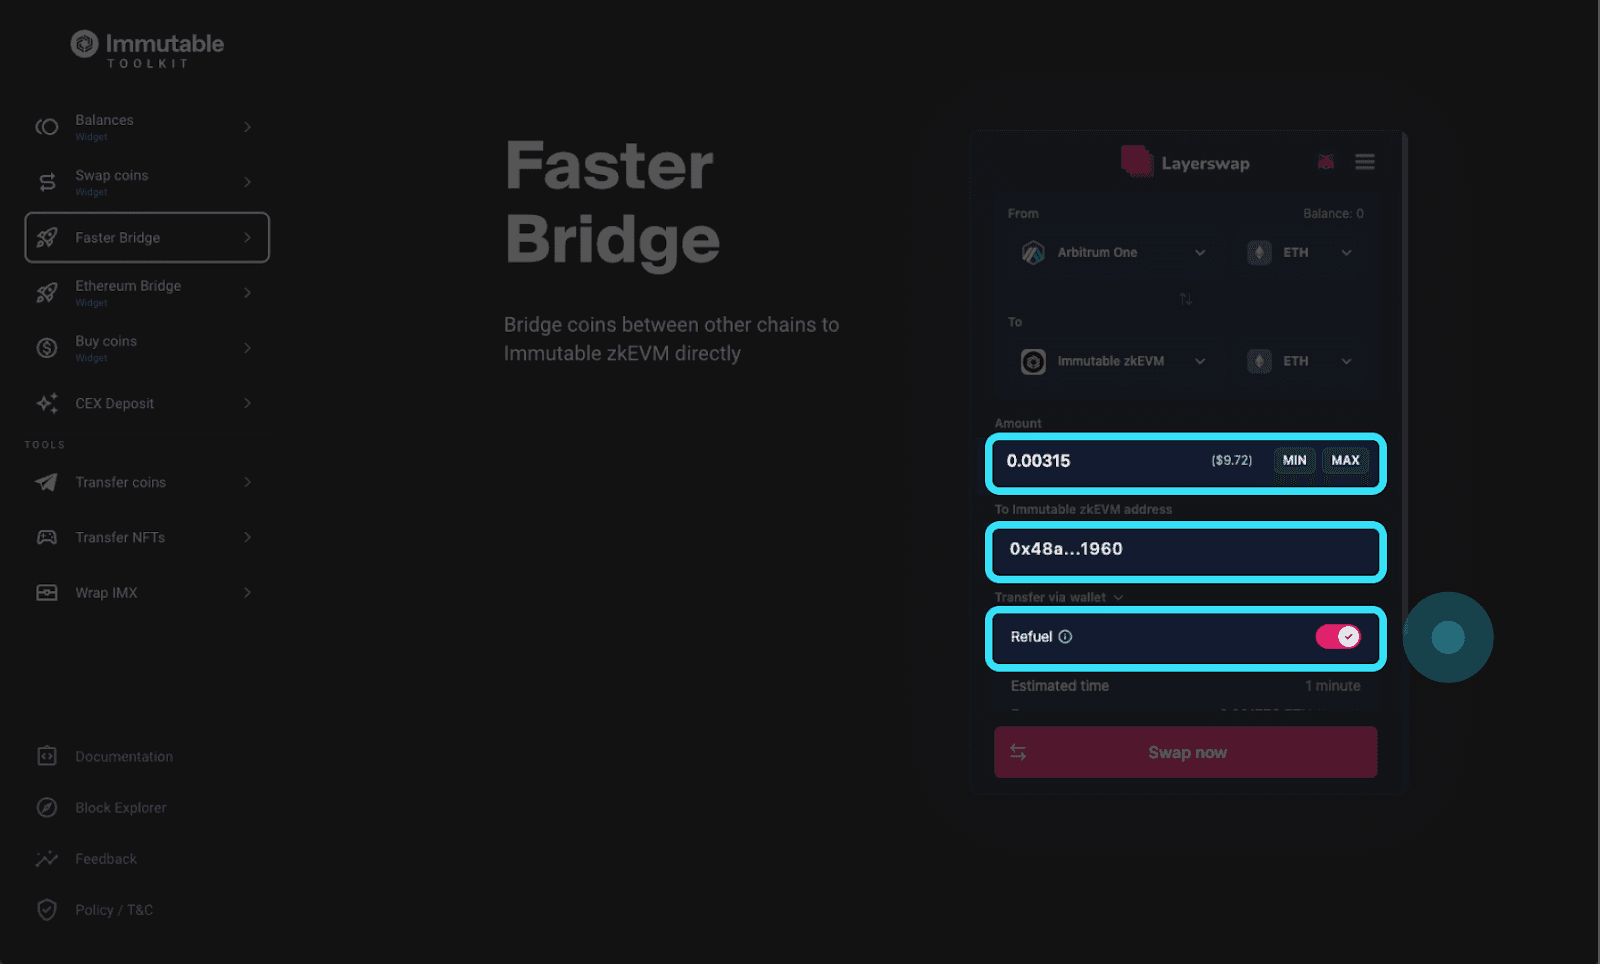
Step 3:
Input the desired amount you want to bridge
Input your Immutable zkEVM wallet address
Pro tip: Turn on “Refuel”. This will give you some $IMX to pay for gas on Immutable zkEVM. Without it you may need to bridge more funds to pay for gas!
Click swap now
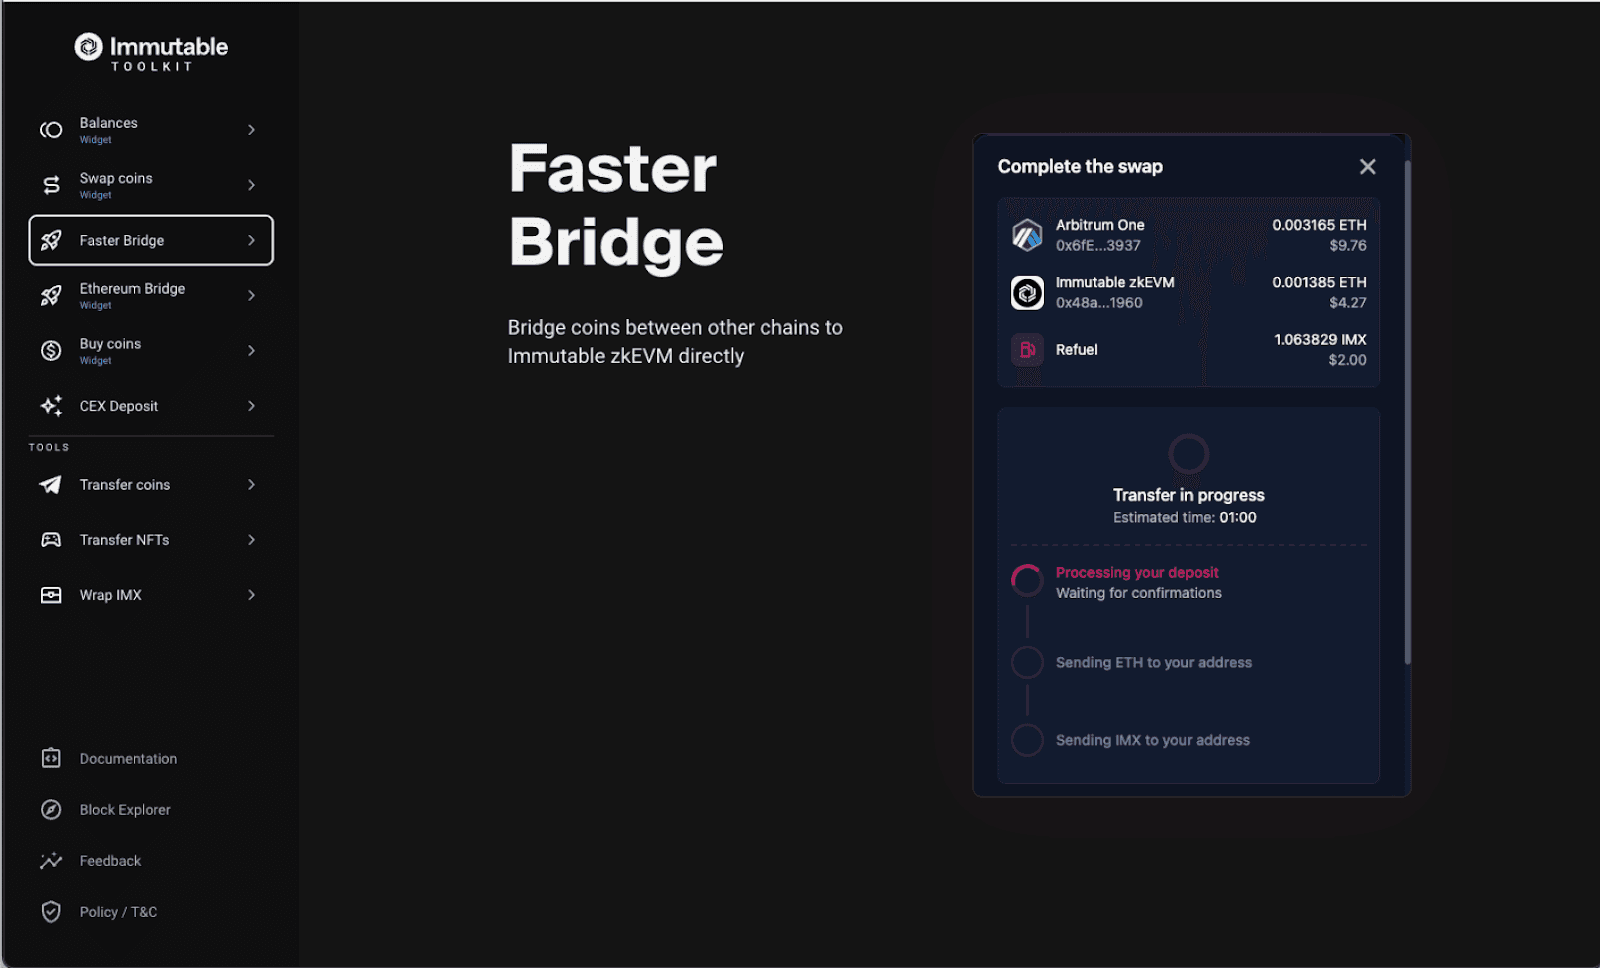
Congrats!! you now have bridged funds into your Immutable Passport
Option 3: Bridging funds using Immutables Native Swap
Step 1: Go to Immutable Toolkit (*note this can also be done in your Immutable Passport Dashboard)
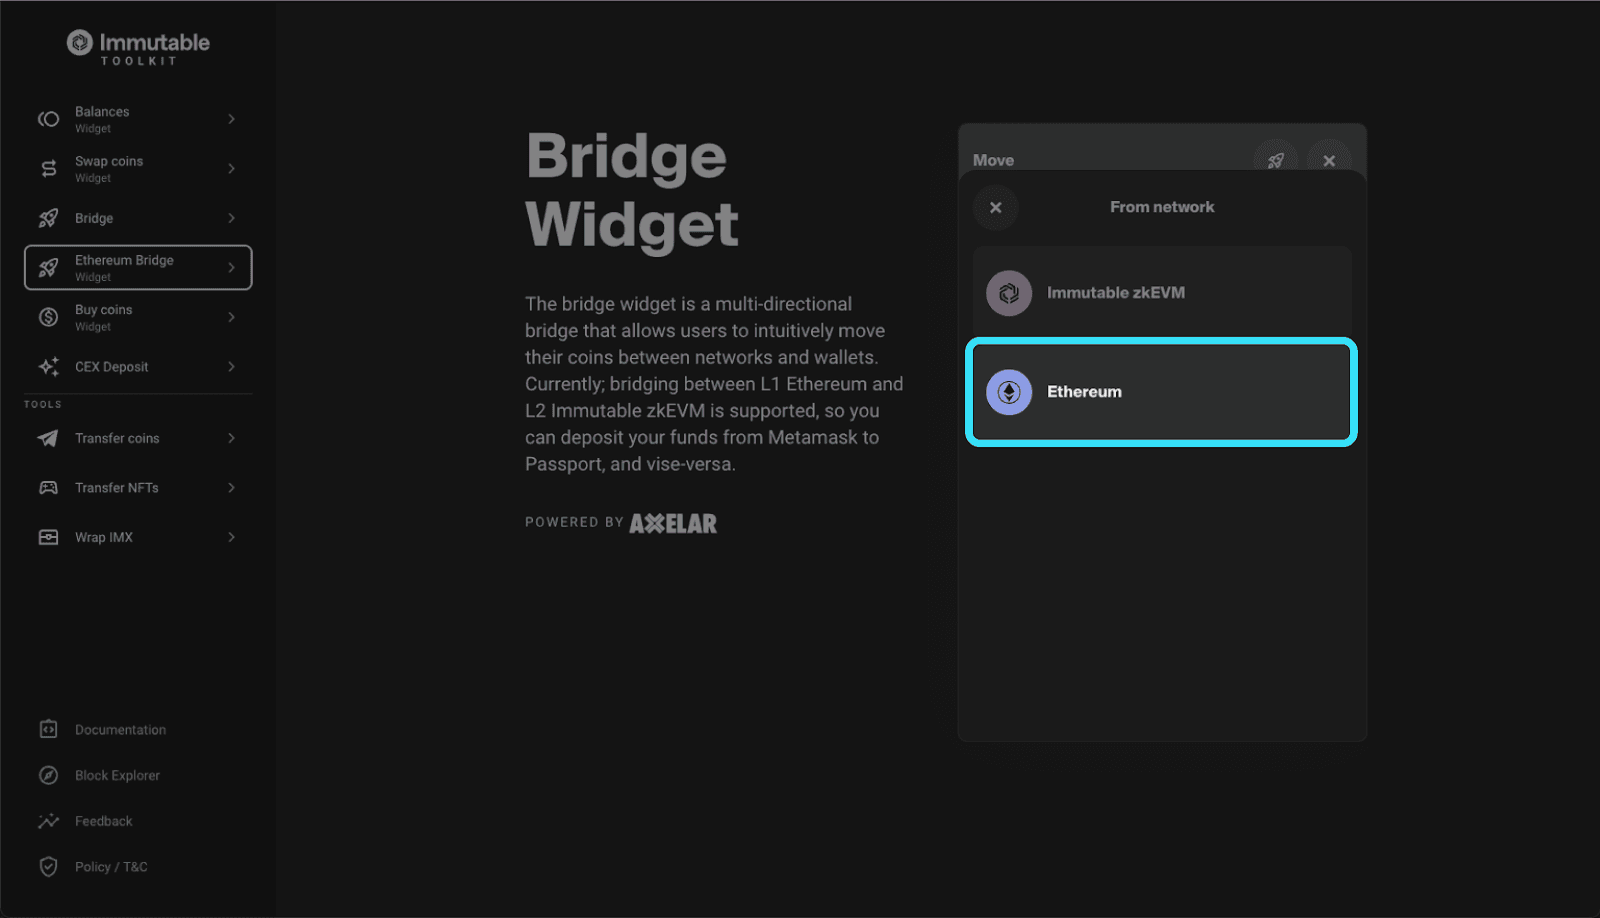
Note: Ethereum is currently the only supported network for the native bridge.
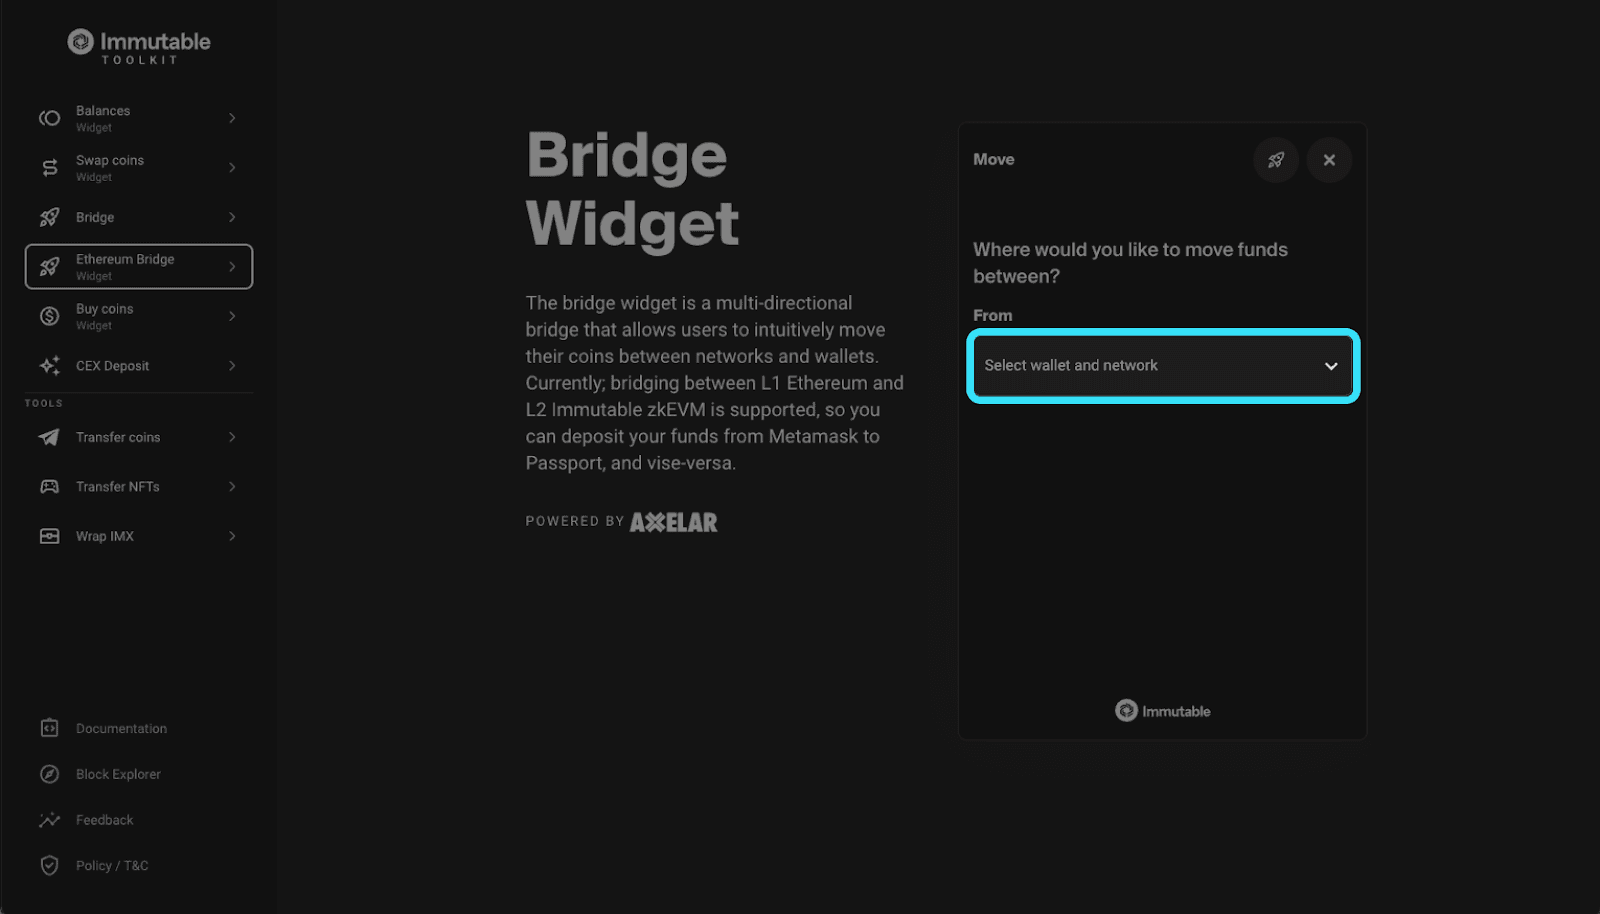
Step 2:
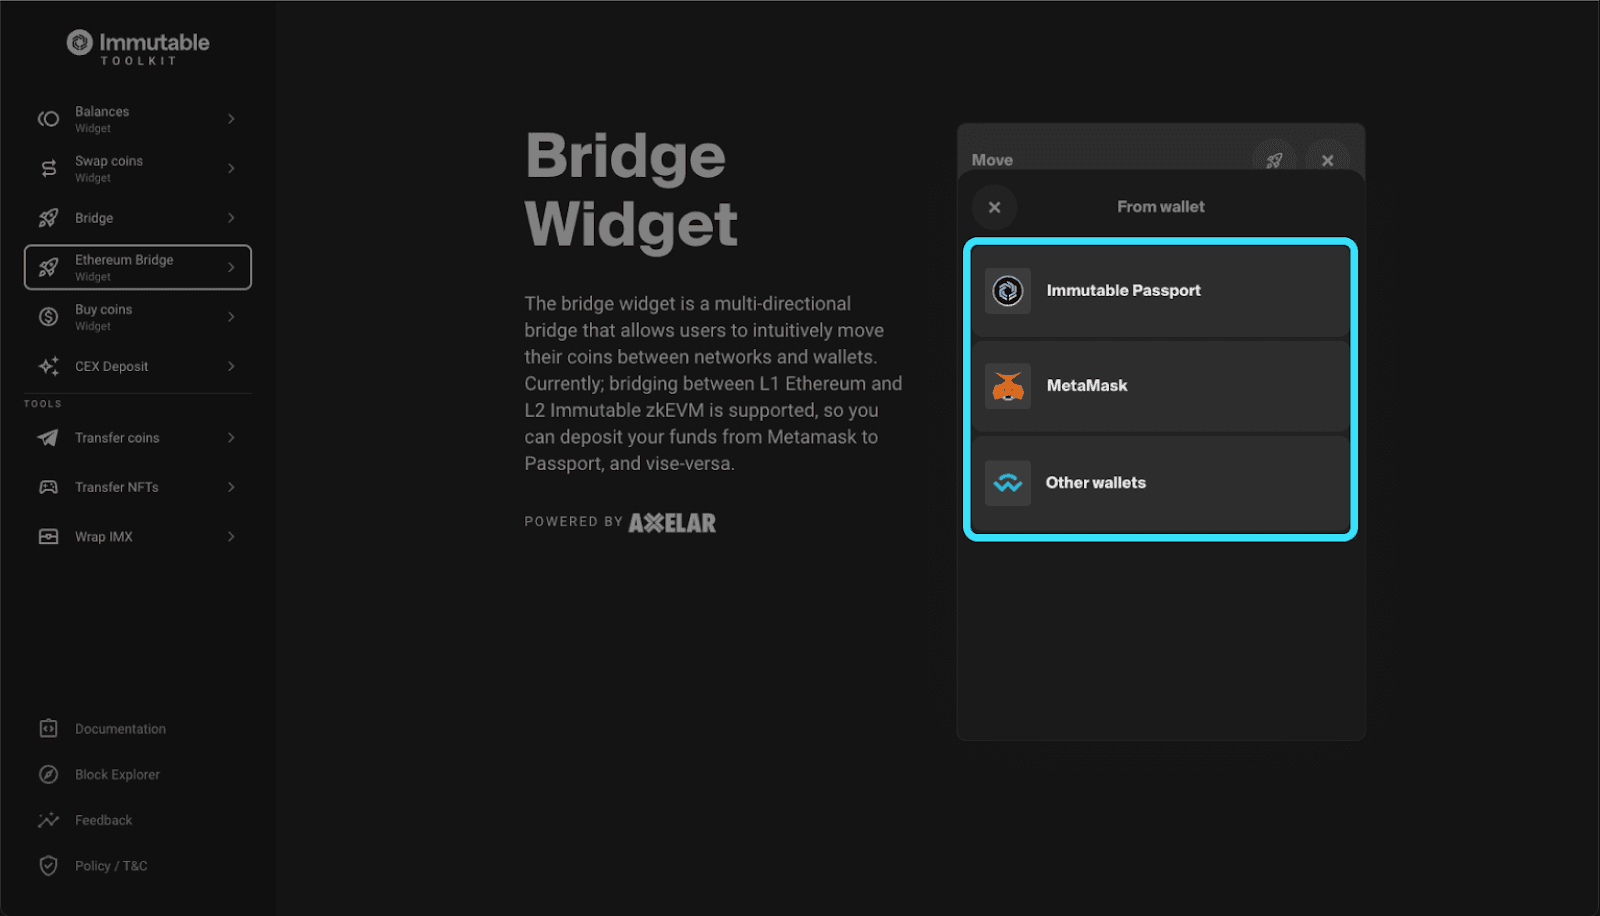
Select the wallet and network you want to send from
Select the wallet and network you want to send to
Step 3:
Select which token ($IMX, ETH or USDC) that you would like to bridge
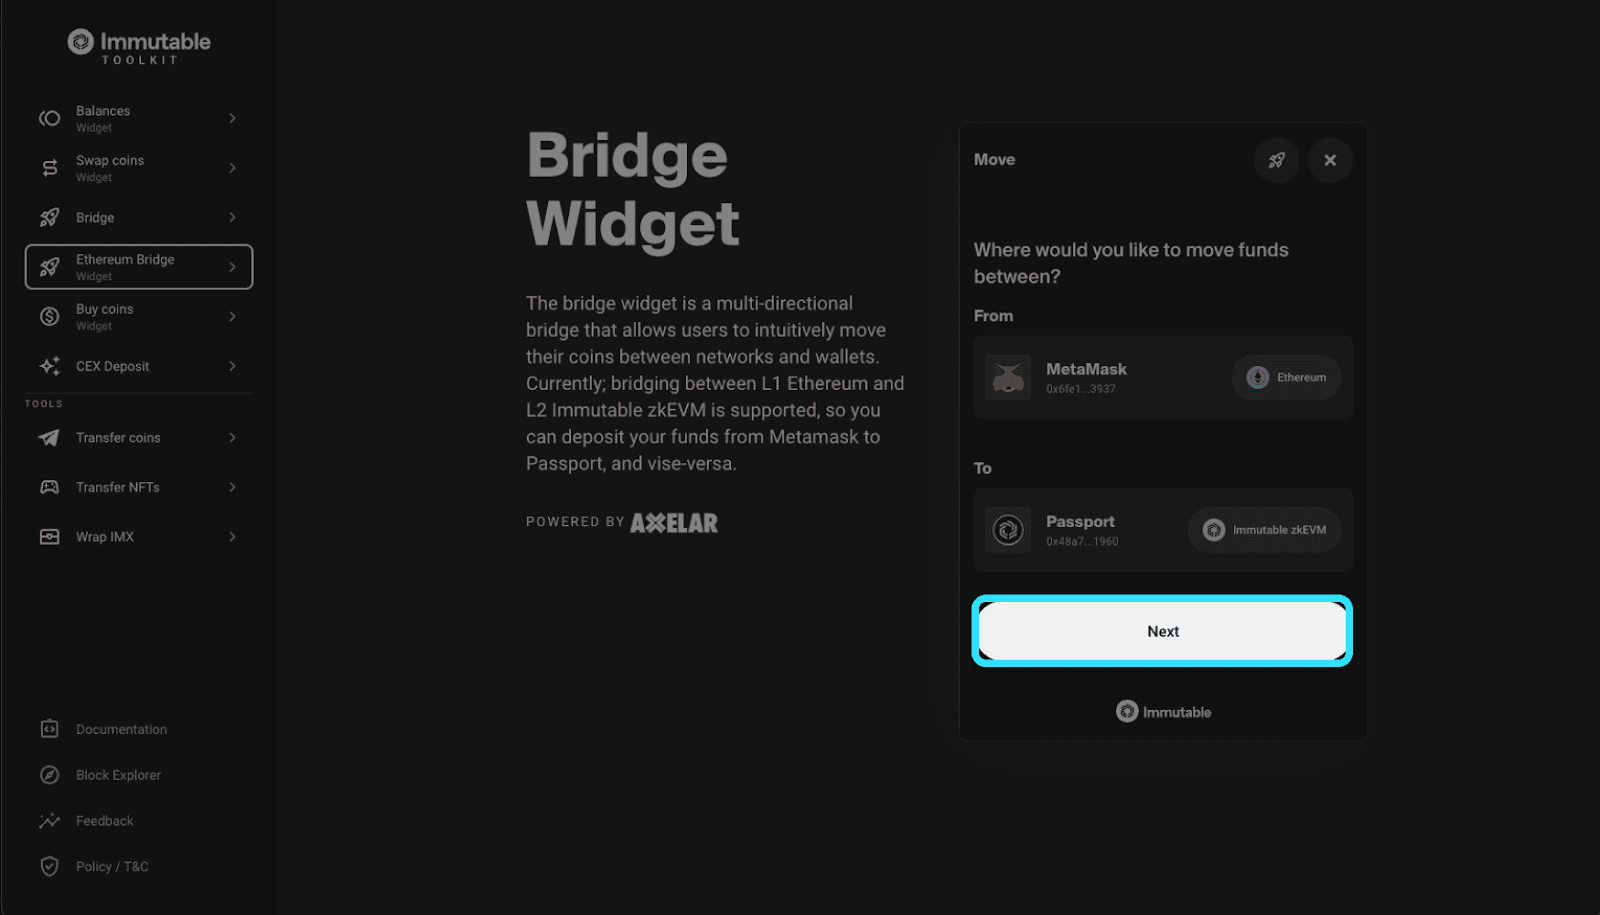
Enter the amount you want to bridge and click review


Step 4: Click ‘Confirm move’ and sign the transaction in your wallet
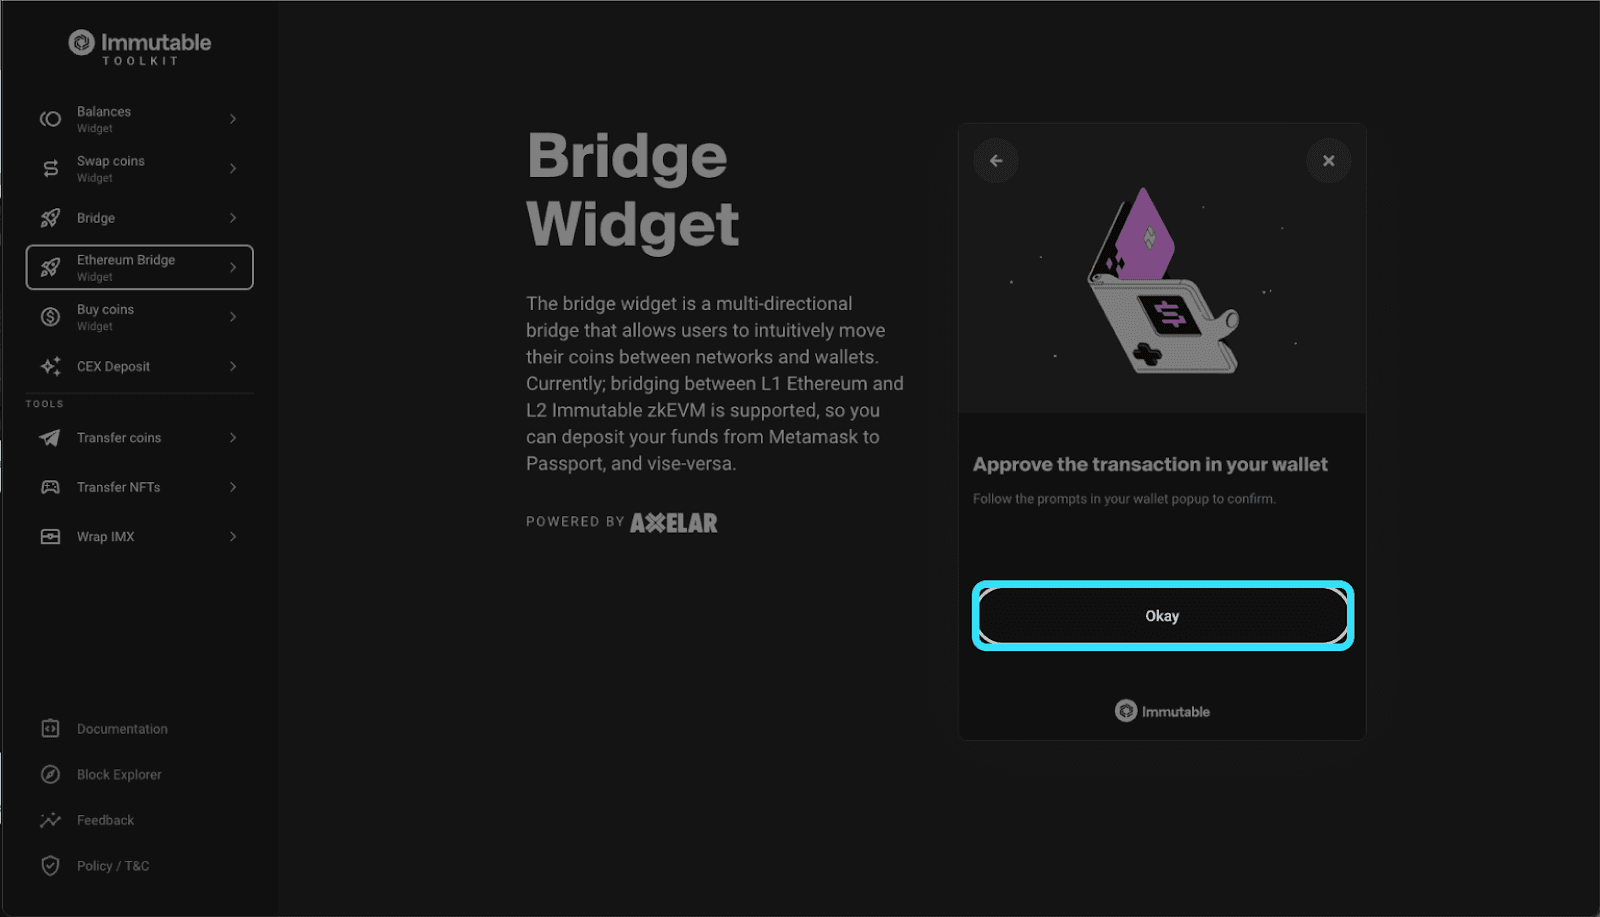
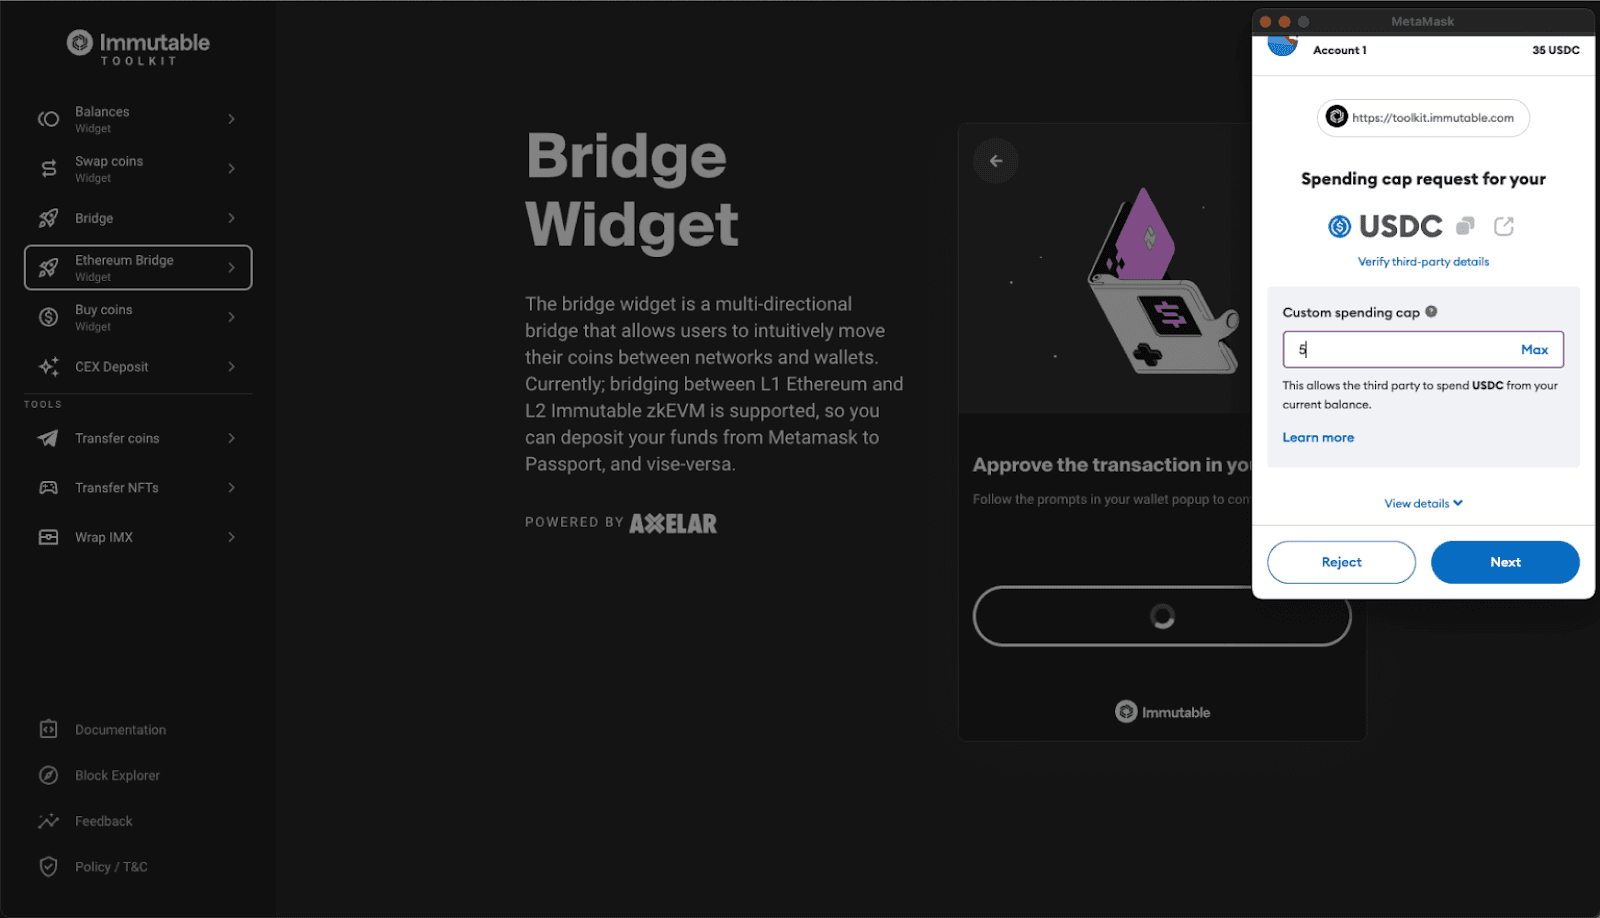

Congrats!! you now have bridged funds into your Immutable Passport
Swapping ETH or USDC into $IMX
If you have bridged ETH or USDC to Immutable zkEVM, you'll need to swap those tokens for $IMX using:
Native Swap (powered by Quickswap) accessible via Immutable Dashboard or Immutable Toolkit (Not available in US or Australia)